
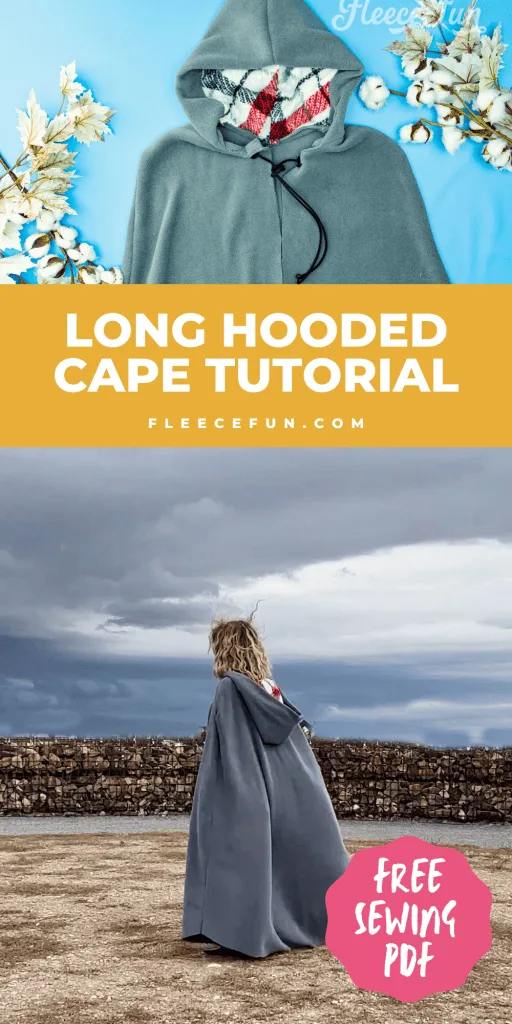
Hooded Cloak
A full-length hooded cloak lined and finished—the weekend project that reads like you spent months on it. This is a beginner-friendly build that teaches you the fundamentals: cutting large pieces, sewing clean seams, drafting a hood that fits, and installing a functional clasp. 4 components, 10 materials, ~3 weeks, $60-150.
3 weeks
11
10
4
See the whole look before you start.
References, materials, budget, and build order for Hooded Cloak.
Timeline
3 weeks
Color refs


Materials
10 items
Budget
$60 - $150
save the visual refs
Full reference board
The preview above is curated for scanning. This is the working board you clone into your own build, with notes, colors, product images, and extra references intact.
Images are sourced from around the internet to help you get started. Use the web clipper to build your own reference library.
Build guide
Buy your fabric in person and feel it in your hands. That's the single most important piece of advice I can give you. Photos lie about weight and drape, and the cloak is all about how the fabric falls. I learned this the hard way when I ordered what I thought was wool from an online vendor and got home to find it was actually a polyester blend that hung like a bedsheet.
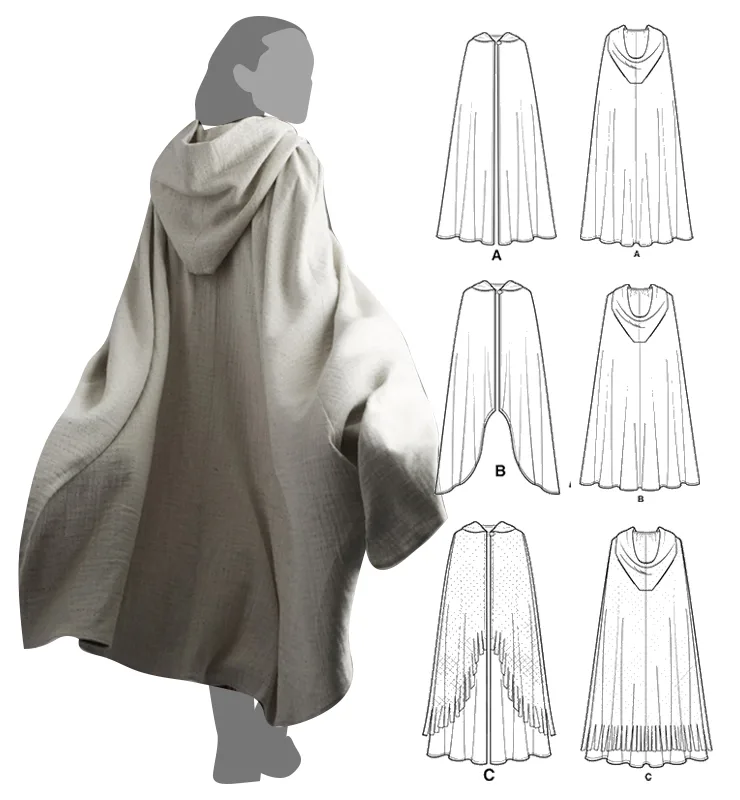
A hooded cloak breaks down into four pieces: outer shell, lining, hood, and clasp. The shell is just a circle or A-line shape. The lining mirrors it. The hood is where everything lives and dies.
Your hood needs to fit your head. Not vaguely. Specifically. I see so many cloaks where the hood is either tiny and pulls the neckline, or so loose it falls off when the wearer turns their head. The measurement that matters is your head circumference at the widest point, usually your forehead. Add an inch or two for ease and draft from there. Lay pattern paper on the floor, use a compass or string and pencil to draw the arc, cut it out, and test-fit it on your own head. Does it sit right? Does it cover your ears? Does it stay put when you move? If the answer is no to any of that, redraft before you cut into the real fabric.
I found a gorgeous charcoal wool coating at the Joann Fabrics in Pasadena for $14 a yard, and I bought six yards. That fabric cost $84 total. The lining, a smooth cotton from the discount bin at maybe $3 a yard, was another $18. Interfacing, thread, and the clasp brought me to about $110 for the whole build. You can absolutely spend less if you shop sales or find remnants, or more if you go for a fancier lining or a premium clasp.
Once your hood pattern is right, the construction is honestly soothing. Cut your outer pieces carefully, sew them together, finish the edges (I used a serger, but pinking shears work fine too), and press. Cut the lining the same way and press. Pin the hood to the neckline, sew it in, and press that seam flat. Attach your lining with a blind stitch, tiny stitches that hold without puckering. You can do this entirely by hand if you don't have a machine that's comfortable for you. The whole project took me about three weekends, maybe 12 hours of actual sewing time, because there's a lot of pressing and fitting.
The clasp goes at your throat, hand-sewn through both layers with thread that won't break. I used upholstery-weight thread because it's thicker and stronger. Sew it at least four times through the clasp holes so it stays put when you're wearing it. Make sure the cloak itself sits loosely around your neck. You should fit two fingers in without strain. A cloak that pulls tight is uncomfortable at a convention or faire after an hour.
One thing surprised me: lining makes all the difference. The very first cloak I made, I skipped the lining to save time. It looked cheap. The seams showed, the inside was raw, and it looked like a blanket somebody sewed in an afternoon. When I added lining to the next one, suddenly it felt like a real garment. That's what separates a project from something you'll actually wear and love.
Components
Outer shell
Hood
Lining
Clasp or closure
Materials list
10 itemsEstimated total cost
$60 - $150
Milestone timeline
3 weeks- 1
Gather inspiration and pick your cloak style (circle, A-line, or asymmetrical hem)
Research
- 2
Take measurements and draft cloak pattern pieces
Patterning
- 3
Buy fabric and test a small seam sample in your chosen fabric
Materials
- 4
Cut outer cloak piece from wool or heavy cotton
Construction
- 5
Sew side seams and finish edges (serger, pinking, or clean finish)
Construction
- 6
Draft and cut hood pattern pieces
Patterning
- 7
Sew hood pieces and attach to neckline
Construction
- 8
Cut and sew lining pieces to match cloak
Construction
- 9
Pin and hand-stitch lining to outer cloak with blind stitch
Finishing
- 10
Position and secure clasp at neckline
Finishing
- 11
Press entire cloak and wear test
Wear test
Frequently
asked questions.
Related tools and guides
Plan your build, estimate costs, and get ready.
Budget Calculator
Estimate your build cost before you start buying materials.
Convention Checklist
88-item packing checklist. Check off items as you pack.
Prop Scaling Calculator
Scale reference images to your body measurements.
How Much Does a Sewing Project Cost?
Real build budgets with specific products and dollar amounts.
Sewing on Costumary
Templates, tools, and workspace built for sewing makers.
Browse all templates
Explore build plans across 10 craft verticals.
Start this build free
Clone this template into your workspace. Track materials, milestones, budget, and build progress in one place.
Related templates
Sweet Lolita JSK
4 weeks · 18 milestones
A sweet lolita jumperskirt: fitted bodice, gathered or pleated skirt with shirring or lace-edged waistband, tiered ruffles, lace trim everywhere. The bodice is the technical core, the lace application is where precision shows, and the skirt needs serious volume without looking limp. 6 components, 12 materials, ~4 weeks, $70-180.
Commission Garment
8 weeks · 15 milestones
Build a garment for a client with measurements, muslin fittings, approval checkpoints, and professional handoff. Covers client briefs, quoting, remote fitting strategies, progress communication, and shipping finished garments safely.
Layered Petticoat
2 weeks · 14 milestones
A multi-layered petticoat or crinoline for historical dresses, lolita coords, or cosplay skirts. The fullness comes from gathering long fabric strips and stacking them in tiers, building volume without a rigid frame. Choose between cotton voile for light fluff or organza for structure and visible iridescence. 4 components, 11 materials, ~2 weeks, $30-80.
Cottagecore Dress
3 weeks · 13 milestones
A prairie-inspired cottagecore dress with puffed sleeves, gathered skirt, and delicate finishing. The puffed sleeves are the focal point, requiring careful sleeve cap sizing and gathering. This is a forgiving first garment project for sewers who want something wearable and romantic. 4 components, 11 materials, ~3 weeks, $50-140.