
Denji Cosplay
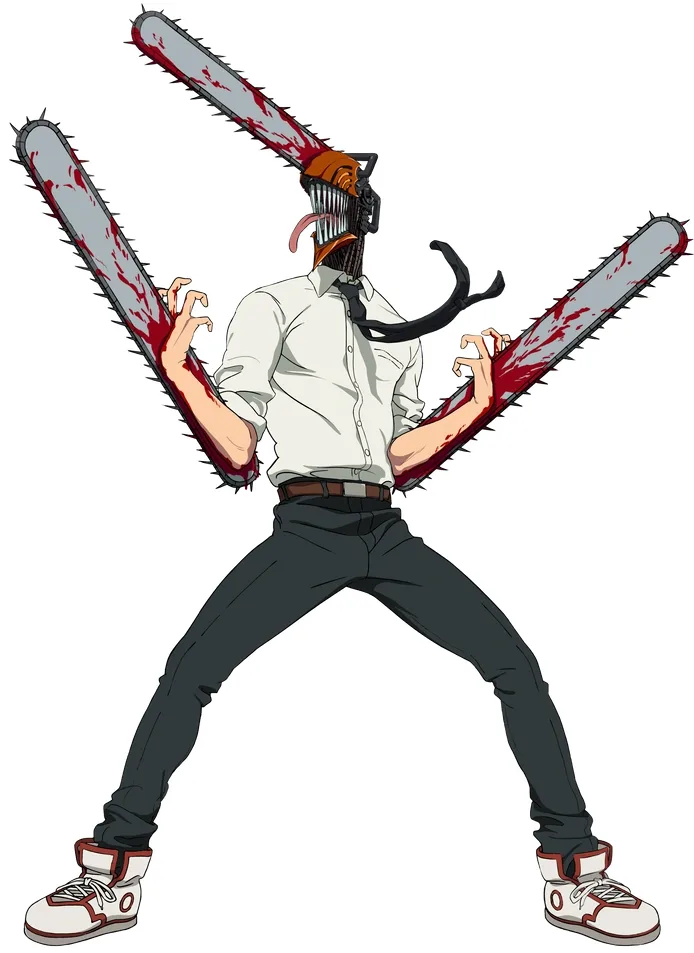
Chainsaw Man's protagonist in his iconic hybrid form: the human body with a chainsaw head and transformable chainsaw arms. The hand-carved foam helmet with chain-link detailing is the make-or-break piece, demanding precision foam work and 8-12 weeks of dedicated building. A full build includes the school uniform base, prosthetic teeth, spiky hair, and the chainsaw arms or helmet. 6 components, 14 materials, ~10 weeks, $200-500.
10 weeks
15
15
6
See the whole look before you start.
References, materials, budget, and build order for Denji.
Timeline
10 weeks
Color refs


Materials
15 items
Budget
$200 - $500
save the visual refs
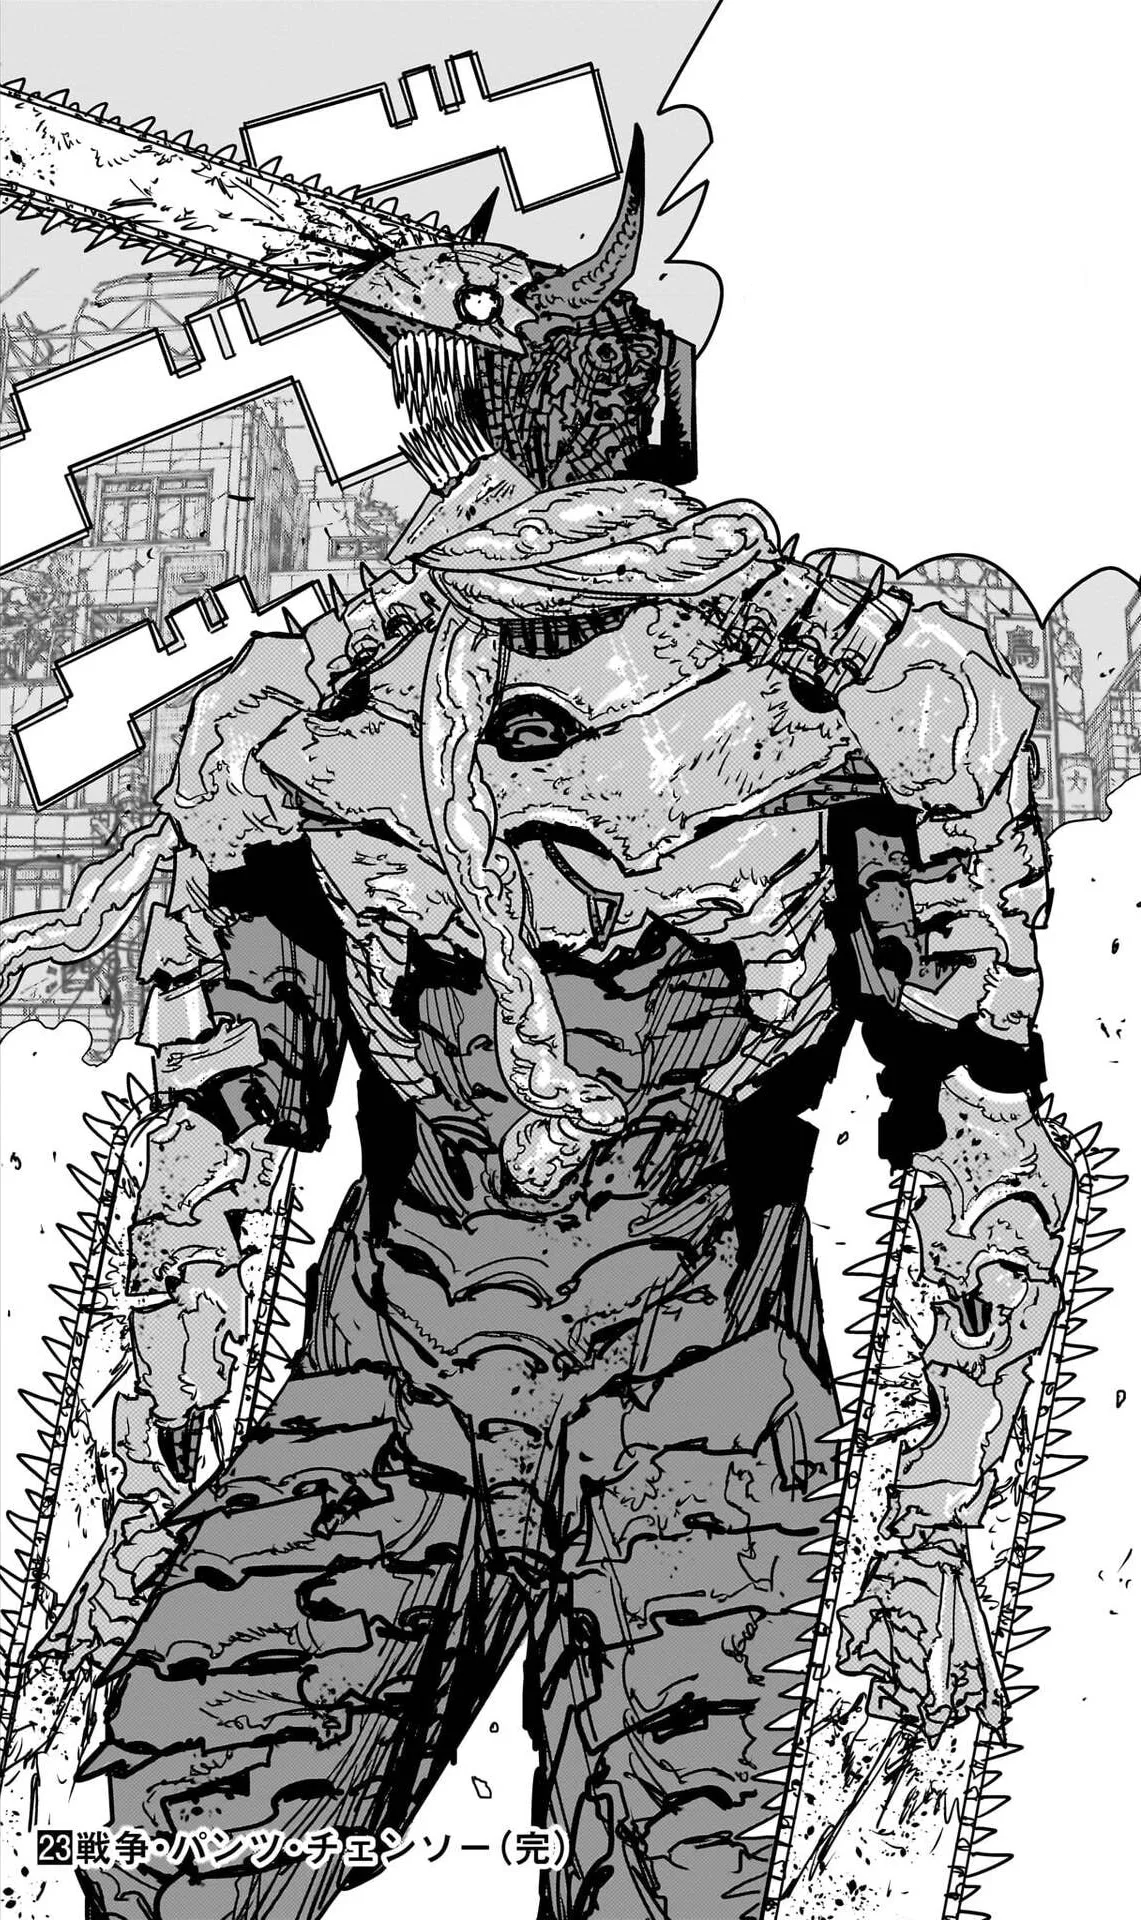
Full reference board
The preview above is curated for scanning. This is the working board you clone into your own build, with notes, colors, product images, and extra references intact.
Images are sourced from around the internet to help you get started. Use the web clipper to build your own reference library.
Build guide
I carved my first Denji helmet blade wrong. Spent 12 hours on half the chain links, realized the spacing was off, and had to cut away three inches of foam and start over. That particular failure cost me two weeks and a lot of doubt about whether this build was even worth it. Spoiler: it was. But I need you to know going in that the carving work is real, and mistakes are expensive in terms of time.
The chainsaw head is where all your effort lives. The school uniform base is just shopping. The wig is shopping plus some heat styling. The teeth are a twenty-dollar prosthetic you paste in before getting dressed. But that helmet. That thing will eat six to eight weeks of your life if you're doing it right, which you should be, because the details are what makes people stop you for photos instead of just glancing as you walk past.
Start with templates. SKS Props has free PDFs on DeviantArt that are already scaled to reasonable sizes. Print them at full scale, tape them together, and build a cardboard mockup first. This step sounds boring and like it's eating time, but it's not. I skipped it on my first pass and built the whole thing backwards. The helmet was upside down. I didn't realize until I was halfway through carving. Do the cardboard mockup. It's four hours now or two weeks of regret later.
For the foam, grab assorted EVA sheets, 6mm and 10mm. You'll need maybe 10-12 sheets depending on helmet scale, so budget around forty-five dollars on foam. Get contact cement by the big can, not the small tubes. Stack your foam pieces, glue them, clamp them overnight, and let them sit while you plan the carving. I cured my helmet halves for 48 hours before touching them with a blade. Patience now saves frustration later.
Now the chain links. This is where I'm going to spend three paragraphs because this is the trap. Get a rotary tool, a Dremel or equivalent, and order the foam carving bit kit from Amazon. Medium speed works better than high speed because high speed chatters and catches. You'll carve ½-inch strips into the foam blade edges to create the chain texture. Test on scrap first. Get comfortable with the tool. Practice the depth and angle on pieces you're okay with throwing away. The real thing costs forty-five dollars in materials and weeks of your time. Mistakes sting.
Carve in six-inch sections working from one end to the other. Mark your sections with a pencil and ruler so the spacing stays consistent. Go slow. A rotary tool is loud and the dust is annoying, so work in your garage or outside if you can. After you finish one section, photograph it next to your reference image and make sure it reads correctly from arm's length. If it does, move to the next section. If it's off, correct it now rather than sanding it down later. You'll spend 40 to 80 hours on this carving depending on helmet scale and how many details you're adding. I spent 65 hours over six weeks. Some people report three months. I'm not faster than most, so budget conservatively.
Once the carving is done, prime everything with Flexbond or Plasti-Dip. Two to three cans should cover a full helmet and shoulders depending on how thick you spray. Let that cure for 24 hours. Then paint with acrylic, metallic silver for the blade, black and red for accents and details. Spray-paint the base colors, then hand-paint smaller details. The chain links don't need individual painting once you've got the metallic base down. The shadow and depth from the carved texture does the visual work for you. Don't hand-paint every single link. It's not worth the time and it won't look better for it.
The school uniform is the easy part. I thrifted mine from a costume rental shop in Torrance for twenty-two dollars. White button-up shirt, black pants, black tie. If you can't find a full set, buy individual pieces from Target or a uniform supplier. The fit matters because you're wearing it under or around a five-pound helmet, so make sure nothing bunches awkwardly at the collar or shoulders. Try it on with a mock helmet before the con so you know how the proportions feel.
Teeth next. Buy shark-tooth prosthetics from AliExpress, around twenty dollars, and practice wearing them with your helmet and shirt together. The angle changes what you look like on camera. Wear them in front of a mirror and a camera phone for two hours to make sure they don't feel loose and you're not constantly aware of them. If they slip or hurt after an hour, you'll hate con day and you'll take them out early, which defeats the purpose. A bad fit breaks the whole look.
The wig is straightforward if you plan ahead. Order from Arda Wigs or similar and specify that you want short, spiky, reddish-blonde, styled for Denji Chainsaw Man. Custom orders cost 55 to 70 dollars and arrive styled. If you try to reshape a long wig yourself, you're looking at six to eight hours of work and a high chance of singing the fibers with a heat gun if you're not careful. I learned this from a wig I bought for a different build that I absolutely ruined. Use a hair straightener on low heat, not a heat gun. The straightener gives you control. A heat gun will warp the fibers and you'll end up with melted spots.
The biggest shock on con day is how heavy and hot the helmet gets after thirty minutes. You'll start out wanting to wear it all day. By noon you'll be looking for a bathroom to take it off and just walk around in the school uniform. Plan for that. Don't commit to eight hours in that helmet. Plan to wear the full look for hall walks and photo ops, then change into just the uniform for browsing and breaks. A lot of builders don't think about this until they're already sweating through a costume.
For wearability, drill ventilation holes in the back and sides of the helmet shell once it's painted. Three-eighths inch holes in a pattern. It cuts weight and improves airflow. I added foam padding inside where the helmet contacts my head. Test-wear the full costume in a warm room for 45 minutes before the con. You'll know right then if you need to add more ventilation or make adjustments. Better to sweat in your garage now than at the convention.
Total timeline is ten weeks minimum if you're experienced with foam work. If this is your first prop, budget 12 to 14 weeks and give yourself grace for the learning curve on carving. The helmet carving alone will test your patience multiple times. I considered scrapping it three times. I'm glad I didn't. When people recognize the costume from across a hallway and come up to get photos, all those hours stop feeling like punishment.
Components
Chainsaw head (hybrid helmet)
Chainsaw arms (shoulder-mounted or glove-based)
School uniform base (white shirt, black pants, tie)
Prosthetic teeth and mouth detail
Spiky reddish-blonde wig
Boots and accessories
Materials list
15 itemsEstimated total cost
$200 - $500
Milestone timeline
10 weeks- 1
Research Denji reference images and decide on helmet scale and arm style
Research
- 2
Download helmet templates and test-fit cardboard mockup
Patterning
- 3
Gather tools: rotary tool, foam carving bits, adhesive
Materials
- 4
Order wig with custom spiky styling notes
Materials
- 5
Cut and stack EVA foam for helmet base structure
Construction
- 6
Hand-carve chain-link detailing on helmet blade edges (biggest time investment)
Construction
- 7
Build internal frame and foam structure for chainsaw arms
Construction
- 8
Prime all foam pieces with Flexbond or Plasti-Dip
Finishing
- 9
Paint helmet and arms with metallic finishes and detail work
Finishing
- 10
Fit and test prosthetic teeth or thermoplastic custom mold
Finishing
- 11
Heat-shape and style the wig to final spiky form
Finishing
- 12
Source and fit school uniform base pieces
Construction
- 13
Practice teeth and mouth makeup application on camera
Finishing
- 14
Full suit-up wear test: helmet, arms, uniform, wig, teeth, boots
Wear test
- 15
Test helmet ventilation, arm mobility, and con-day comfort
Wear test
Frequently
asked questions.
Related tools and guides
Plan your build, estimate costs, and get ready.
Budget Calculator
Estimate your build cost before you start buying materials.
Convention Checklist
88-item packing checklist. Check off items as you pack.
Prop Scaling Calculator
Scale reference images to your body measurements.
How Much Does EVA Foam Armor Cost?
Real build budgets with specific products and dollar amounts.
Cosplay on Costumary
Templates, tools, and workspace built for cosplay makers.
Browse all templates
Explore build plans across 10 craft verticals.
Debut your cosplay build
Upcoming conventions where you could wear this. Dates, checklists, and budget tools included.
Start this build free
Clone this template into your workspace. Track materials, milestones, budget, and build progress in one place.
More from this series
Qifrey Cosplay
5 weeks · 12 milestones
Qifrey's elegant white-robed silhouette is built around three signature elements: the tall pointed hat with the bent tip and black ribbon, the flowing white cape with the brass brooch closure, and the asymmetrical pince-nez glasses with one dark lens hiding his scarred eye. This is an intermediate build that needs more structural crafting than sewing. The hat and glasses demand the most attention, while the cape is a manageable garment project. The glasses and the hat are the make-or-break details, and this template walks you through both. Includes 7 components, 15 materials with cost estimates, a 12-step build plan, and a realistic 5-week, $95 to $280 budget.
Coco Cosplay
6 weeks · 12 milestones
Witch Hat Atelier's apprentice witch in her full outfit: the tall pointed hat with ornamental band, a dark cloak with decorative hem trim, a layered tunic-dress, boots, and her drawing implements. The hat is the signature piece and the hardest to get right. 7 components, 13 materials, ~6 weeks at $120-280.
Gojo Satoru Cosplay
5 weeks · 11 milestones
Jujutsu Kaisen's strongest sorcerer, built around three signature details: the black high-collar uniform jacket, the blindfold, and the white spiked hair. This is an intermediate build that leans on one well-made garment plus wig styling, so it reads instantly on the con floor without months of work. The collar and the wig are the make-or-break details, and this template walks you through both. Includes 6 components, 11 materials with cost estimates, an 11-step build plan, and a realistic 5-week, $90 to $240 budget.
Frieren Cosplay
5 weeks · 12 milestones
Frieren: Beyond Journey's End's elven mage, built around a white high-collar tunic with gold trim, a flowing blue cape, and a wooden staff with a red gem. This is an intermediate build that combines clean garment construction with prop craftsmanship, finished with styled twin-tail wig and elf ear prosthetics. The gold trim detailing and the staff are the signature details, and this template walks you through both. Includes 7 components, 14 materials with cost estimates, a 12-step build plan, and a realistic 5-week, $100 to $280 budget.