
LED / Electronics
Add lights, sound, or animated effects to a costume. Covers circuit planning, component selection, breadboard prototyping, soldering, microcontroller programming, battery management, and integration into existing costume pieces.
4 weeks
12
10
4
See the whole look before you start.
References, materials, budget, and build order for LED / Electronics.
Timeline
4 weeks
Color refs
Materials
10 items
Budget
$40 - $200
save the visual refs
Full reference board
The preview above is curated for scanning. This is the working board you clone into your own build, with notes, colors, product images, and extra references intact.
Images are sourced from around the internet to help you get started. Use the web clipper to build your own reference library.
Reference images are gathered from around the web and belong to their original creators. We link back to where we found each one. If something here is yours and you want it taken down, email us and it is gone.
Build guide
LEDs turn heads. A costume that glows, pulses, or reacts to sound gets attention that even the most beautifully crafted static build doesn't. The good news is that basic cosplay electronics are simpler than they look. If you can follow a recipe, you can wire LEDs. The bad news is that debugging a circuit in a hotel room at 2 AM with a con badge deadline is its own special kind of hell, so prototype early.
Your finished product is a set of electronic effects (LED strips, individual lights, sound modules, or animated patterns) integrated into an existing costume. The system needs to be wearable, battery-powered, reliable for 6+ hours, and easy to turn on and off. Nobody wants to troubleshoot loose wires while trying to eat lunch in the con center food court.
Start with your effect goal, not the technology. What do you want to happen? Glowing eyes in a helmet? Pulsing light strips along armor seams? A sword that changes color? Color-reactive panels? Define the visual effect first, then pick the components that achieve it. An Arduino Nano handles animated patterns and color changes. A simple battery pack and LED strip with no controller handles static glowing.
Power planning prevents mid-con disasters. A NeoPixel strip running 60 LEDs at full white brightness draws about 3.6 amps. A typical 2000mAh LiPo battery lasts roughly 30 minutes at that draw. The solution is running LEDs at lower brightness (50-70% is usually plenty for indoor cons) and using efficient color patterns. A 2000mAh battery running NeoPixels at 50% brightness in colored patterns lasts 3-5 hours.
Research and Planning
Map out where lights and effects go on your costume. Sketch the wiring paths from power source to every LED or module. Decide where the battery and controller will sit (belt pouch, inside armor, hidden pocket). Plan how to access the battery for charging and the power switch for on/off without disassembling the costume.
Component Selection
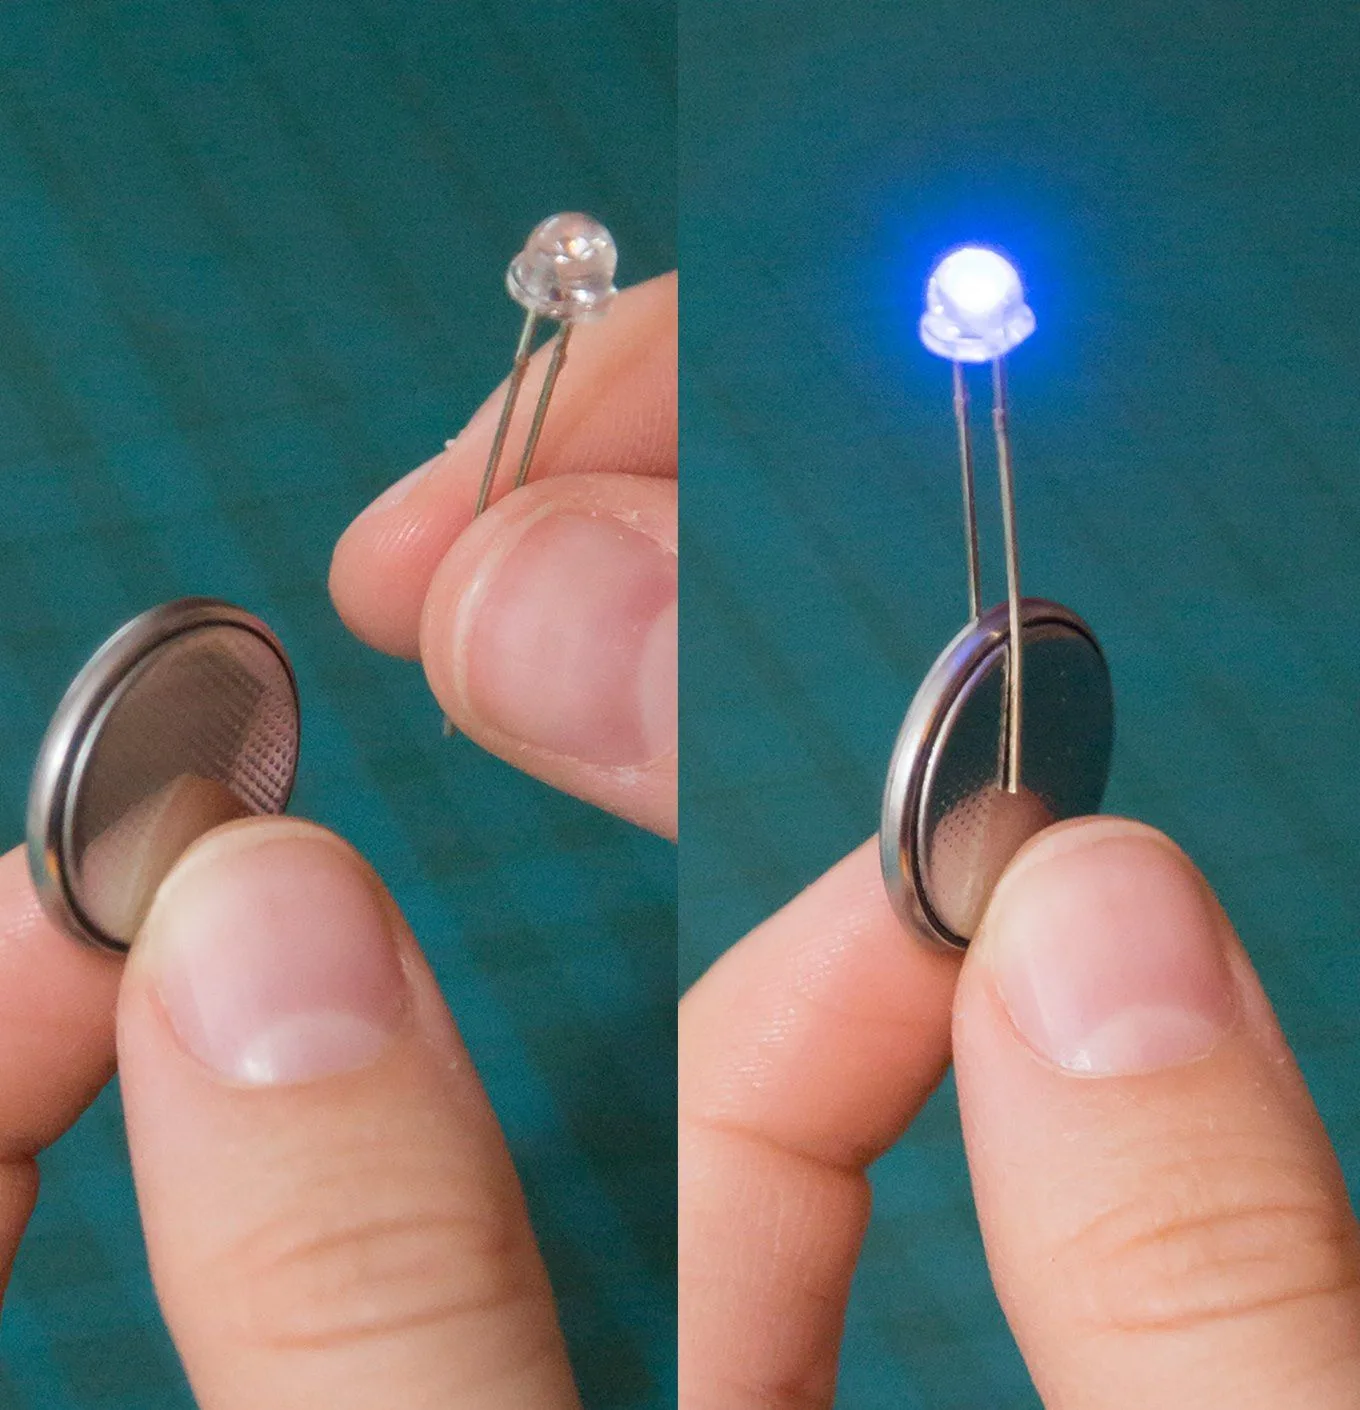
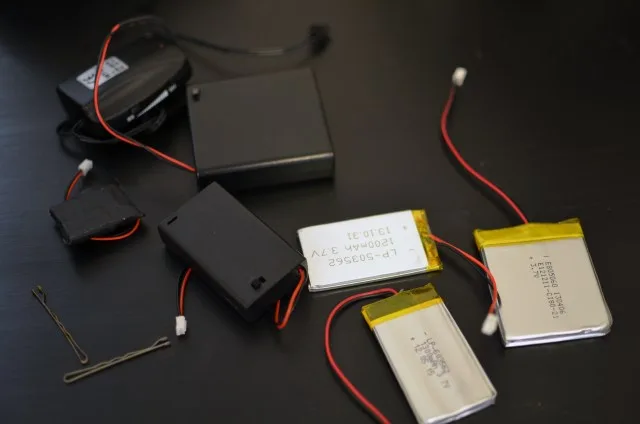
For most cosplay lighting, you need: a microcontroller (Arduino Nano for flexibility, Adafruit Gemma M0 for sewable applications), NeoPixel LED strips or individual LEDs, a LiPo battery pack (1000-3000mAh depending on your LED count and target runtime), hookup wire (22-26 AWG), and a switch. Buy 20% more wire and LEDs than you think you need. Running short during assembly is miserable.
Prototyping
Build your circuit on a breadboard first. Every single time. This is where you discover that your LED pattern code needs adjustment, your battery can't handle the load, or your wiring plan has a short. Fix everything on the breadboard where changes take seconds, not on the costume where changes require desoldering.
Soldering
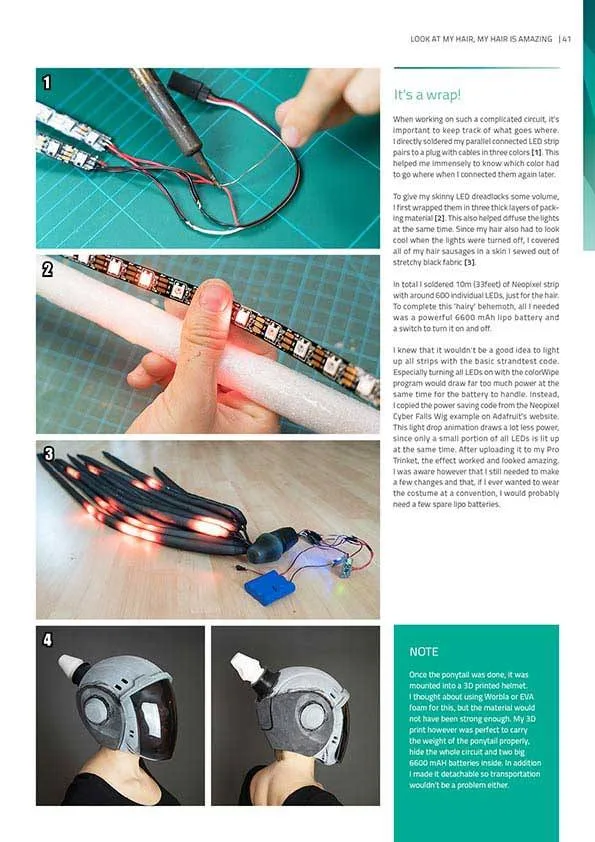
Solder permanent connections once the prototype works. Use stranded wire (not solid core) for costume applications because it flexes with body movement. Heat shrink tubing over every solder joint protects against shorts and adds strain relief. Solder in a well-ventilated area with lead-free solder.
Programming
Upload your code to the microcontroller before installing in the costume. NeoPixel strips use the Adafruit NeoPixel library with Arduino IDE. Start with example sketches and modify. Simple color cycles, breathing effects, and static colors are achievable with 10-20 lines of code. Sound-reactive effects need an additional microphone module.
Battery Testing
Test your full circuit under load and time the battery life. If it's under 4 hours, reduce LED brightness, use fewer LEDs, or get a larger battery. Always bring a backup fully-charged battery to the con. USB battery banks work for 5V circuits in a pinch.
Integration
Route wires through your costume structure. Use hot glue to tack wires along seams, inside armor channels, and under fabric folds. Keep wires away from areas that flex heavily (elbows, knees, waist) or add extra slack with service loops at those points. The wiring should be invisible when the costume is worn.
Weatherproofing
Apply heat shrink tubing to all solder joints. Hot glue exposed connections and wire junctions. If the circuit might see sweat or rain, coat solder points with liquid electrical tape or clear nail polish. A sweat-soaked solder joint that shorts out is a guaranteed mid-con failure.
Full Integration Test
Put the entire costume on with all electronics running. Move around, sit down, raise your arms. Check that no wires pull, no connections come loose, and the effect looks right from the outside. Run the system for at least 2 hours to verify battery life under real conditions.
Common mistakes
- Skipping the breadboard prototype. Debugging a soldered circuit inside a costume is ten times harder than debugging it on a breadboard on your desk. Prototype first, always.
- Undersized battery. Calculate your power draw and test runtime before the con. A battery that dies in 2 hours means your lights are off for most of the day. Bigger battery or lower brightness.
- Solid core wire in wearables. Solid wire snaps when you move. Stranded wire flexes. This is the number one cause of mid-con circuit failure.
- No service loops at joints. Wires routed tight across elbows, shoulders, and waist joints break when you move. Leave extra slack in a small loop at every flex point.
- No power switch access. If turning your lights on/off requires removing armor pieces, you'll stop using them. Put the switch somewhere accessible.
Cosplay electronics are a superpower. Once you learn the basics, every future build can light up.
Components
Microcontroller and wiring
LED array or strip
Battery and power
Mounting hardware
Materials list
10 itemsEstimated total cost
$40 - $200
Milestone timeline
4 weeks- 1
Plan lighting and effect layout on costume
Research
- 2
Choose microcontroller and LED type
Research
- 3
Order electronics components
Materials
- 4
Prototype circuit on breadboard
Patterning
- 5
Solder permanent connections
Construction
- 6
Program light patterns or effects
Construction
- 7
Test battery life under load
Construction
- 8
Route wires through costume structure
Details
- 9
Mount and secure all components
Fitting
- 10
Weatherproof solder joints with heat shrink
Finishing
- 11
Full integration test with costume
Wear test
- 12
Pack electronics kit with spare batteries
Packing
Frequently
asked questions.
Related tools and guides
Plan your build, estimate costs, and get ready.
Budget Calculator
Estimate your build cost before you start buying materials.
Convention Checklist
88-item packing checklist. Check off items as you pack.
Prop Scaling Calculator
Scale reference images to your body measurements.
How Much Does EVA Foam Armor Cost?
Real build budgets with specific products and dollar amounts.
Cosplay Commission Cost Breakdown
Real build budgets with specific products and dollar amounts.
Cosplay on Costumary
Templates, tools, and workspace built for cosplay makers.
Browse all templates
Explore build plans across 10 craft verticals.
Debut your cosplay build
Upcoming conventions where you could wear this. Dates, checklists, and budget tools included.
New York Comic Con 2026
Oct 8-11 · New York, NY
The East Coast's largest pop culture convention, with major panels, artist alley, and cosplay showcases.
Anime USA 2026
Oct 9-11 · Washington, DC
A mid-size anime convention in the DC metro area, offering panels, cosplay, and Japanese cultural programming.
Tsubasacon 2026
Oct 9-11 · Charleston, WV
Sekaicon 2026
Oct 9-11 · Newark, OH
Start this build free
Clone this template into your workspace. Track materials, milestones, budget, and build progress in one place.
Related templates
Qifrey Cosplay
5 weeks · 12 milestones
Qifrey's elegant white-robed silhouette is built around three signature elements: the tall pointed hat with the bent tip and black ribbon, the flowing white cape with the brass brooch closure, and the asymmetrical pince-nez glasses with one dark lens hiding his scarred eye. This is an intermediate build that needs more structural crafting than sewing. The hat and glasses demand the most attention, while the cape is a manageable garment project. The glasses and the hat are the make-or-break details, and this template walks you through both. Includes 7 components, 15 materials with cost estimates, a 12-step build plan, and a realistic 5-week, $95 to $280 budget.
Coco Cosplay
6 weeks · 12 milestones
Witch Hat Atelier's apprentice witch in her full outfit: the tall pointed hat with ornamental band, a dark cloak with decorative hem trim, a layered tunic-dress, boots, and her drawing implements. The hat is the signature piece and the hardest to get right. 7 components, 13 materials, ~6 weeks at $120-280.
Sung Jinwoo Cosplay
7 weeks · 15 milestones
Solo Leveling's Shadow Monarch in his iconic default hunter outfit: a long black coat with purple inner lining, structured shoulder armor, fitted pants, and dual daggers. This is an intermediate hybrid build that combines garment sewing with foam armor crafting for the shoulder details, plus prop work for the daggers. The coat and its glowing purple lining are the make-or-break detail. Includes 7 components, 19 materials with cost estimates, a 15-step build plan, and a realistic 5-7 week, $120 to $320 budget.
Gojo Satoru Cosplay
5 weeks · 11 milestones
Jujutsu Kaisen's strongest sorcerer, built around three signature details: the black high-collar uniform jacket, the blindfold, and the white spiked hair. This is an intermediate build that leans on one well-made garment plus wig styling, so it reads instantly on the con floor without months of work. The collar and the wig are the make-or-break details, and this template walks you through both. Includes 6 components, 11 materials with cost estimates, an 11-step build plan, and a realistic 5-week, $90 to $240 budget.
Deadpool Suit Cosplay
5 weeks · 12 milestones
The Merc with a Mouth in full red and black: a head-to-toe spandex bodysuit with diamond-textured fabric, a face shell mask with white magnetic lenses, dual katanas on a concealed back harness, and a utility belt with pouches and holsters. An intermediate build that rewards patience with fit and details. Covers 7 components, 12 materials with cost estimates, a 12-step build plan across 5 phases, and a 5-week timeline at $120 to $350.
Yuta Okkotsu Cosplay
6 weeks · 12 milestones
Jujutsu Kaisen 0's tragic sorcerer bound to Rika's curse: the black school uniform, textured black wig, cursed arm markings, and luminous katana. A balanced build across uniform tailoring, prop construction, and wig styling. 4 components, 11 materials, ~6 weeks, $120-280.
Captain America Cosplay
6 weeks · 12 milestones
The star-spangled Avenger in his Endgame suit: scaled chest armor over a tactical blue base, a white star emblem, red gauntlets and boot details, a foam cowl helmet with ear wings, and the iconic round shield. This is an intermediate build with repetitive detail work on the scales and some prop-making for the shield. Covers 7 components, 12 materials with cost estimates, a 12-step plan across 5 phases, and a realistic 6-week, $150 to $400 budget.
Arlecchino Cosplay
7 weeks · 17 milestones
Arlecchino (The Knave) is Genshin Impact's most cosplay-demanding Fatui Harbinger: a layered suit jacket, structured long coat with back chains, multi-color ombre wig, character-specific X-pupil contacts, and a full accessories set that runs 12+ pieces. This is an advanced build for cosplayers who can sew structured garments, handle prop accessories, and plan a full character makeup look. The make-or-break details are the coat's lapel structure and the wig's silver-black-red color work. Includes 8 components, 14 materials with cost estimates, a 12-step build plan, and a realistic 7-week, $180 to $420 budget.