
Jinx Cosplay
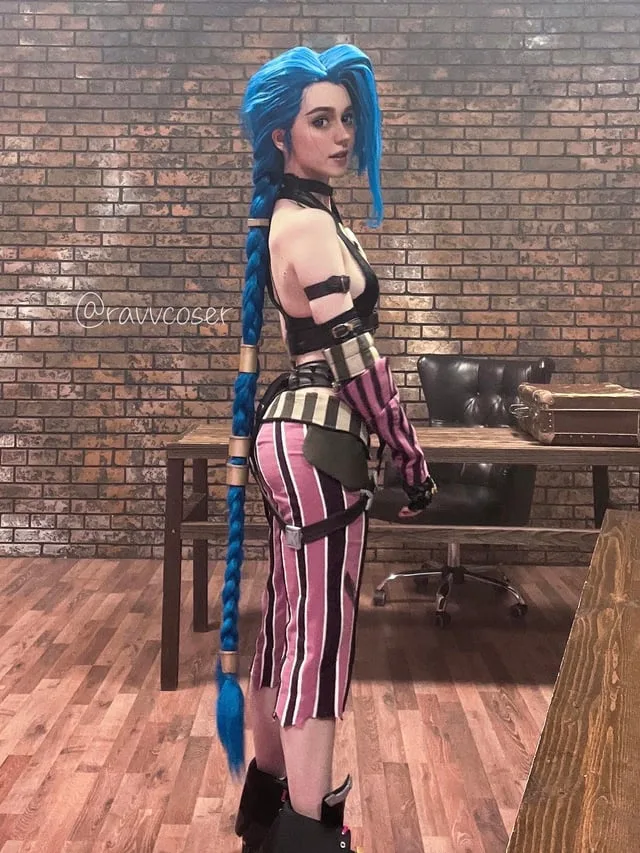
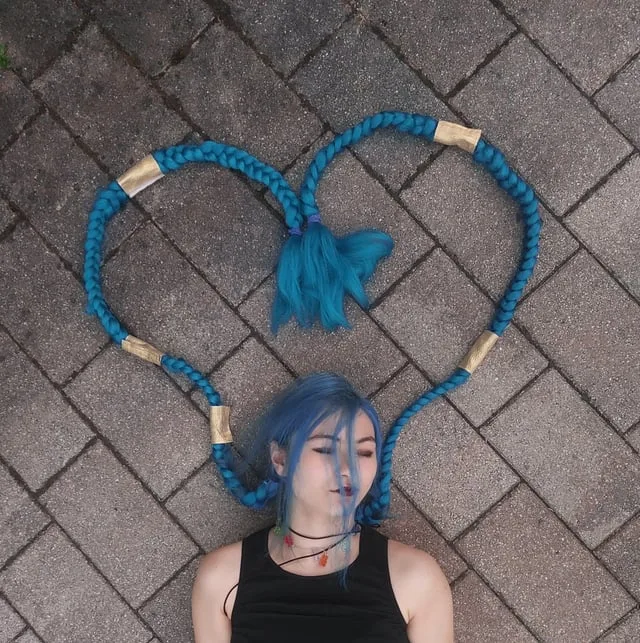
Arcane's chaos gremlin in full: the blue braids, the cloud tattoos, the crop top and belt rig, and optionally Pow-Pow. The braids are the make-or-break detail, 140cm of synthetic fiber that will drag the floor and pull the wig off your head if you don't support them properly. The tattoos take real planning too, whether you paint them on or build armsocks. 6 components, 13 materials, ~6 weeks, $120-320.
6 weeks
13
15
6
See the whole look before you start.
References, materials, budget, and build order for Jinx.
Timeline
6 weeks
Color refs
Materials
15 items
Budget
$120 - $320
save the visual refs
Full reference board
The preview above is curated for scanning. This is the working board you clone into your own build, with notes, colors, product images, and extra references intact.
Images are sourced from around the internet to help you get started. Use the web clipper to build your own reference library.
Build guide
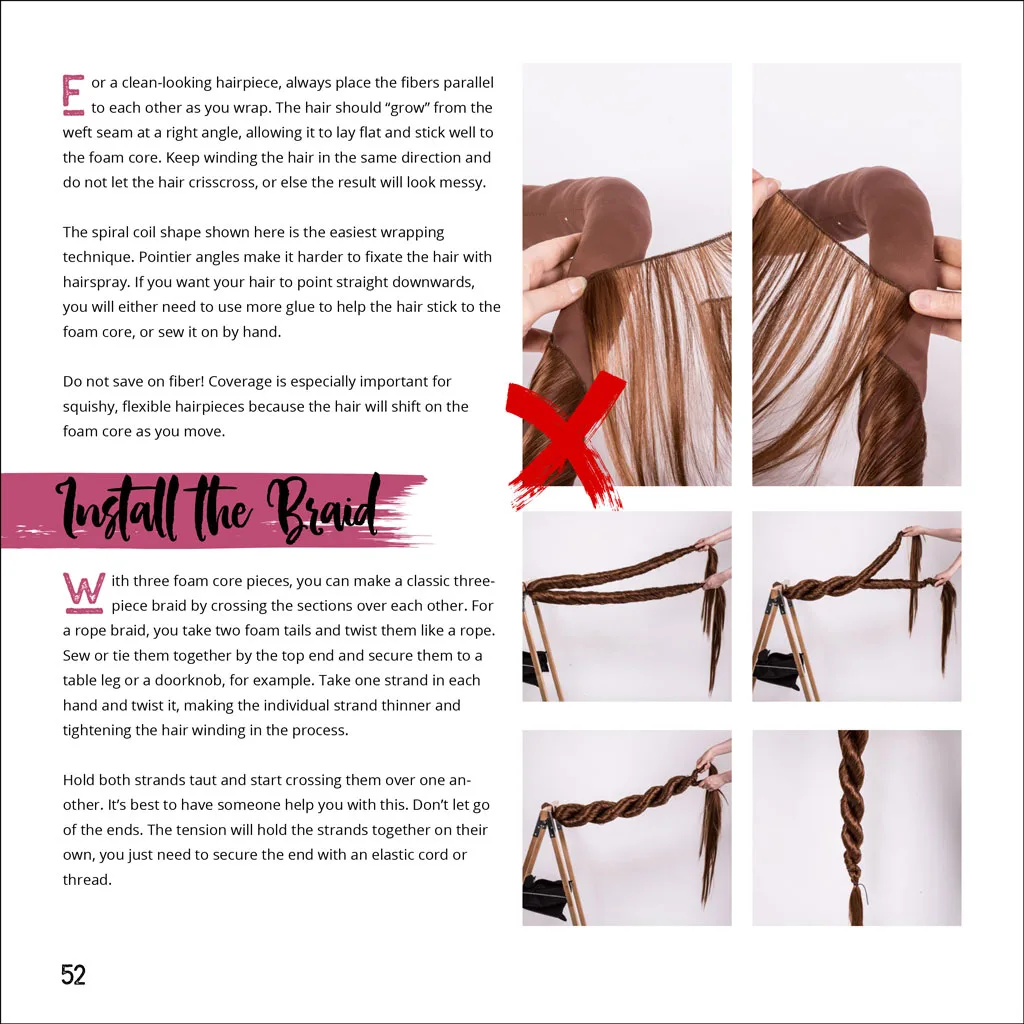
I messed up my first Jinx wig so badly I almost scrapped the whole build. Bought a pre-braided wig off Amazon, wore it for forty minutes at Anime Expo, and both braids unraveled into a blue tangled disaster by the time I hit the dealer hall. So here's what actually works.
Braid it yourself. Buy an unbraided 120-140cm lacefront wig and do the braids by hand. It takes an evening, maybe two, but you control the tightness, you can run a foam core through each braid for structure, and they won't sag to the floor and pull the cap off your head. Secure with clear elastics at three or four points along the length, then sew toupee clips into the wig cap (front and back) and wear a silicone wig grip band underneath. I picked up my wig grip and T-pins from the Arda Wigs booth at Holiday Matsuri in Orlando, and the woman working the table walked me through exactly where to place the clips. Got2b Glued holds the bangs flat against your forehead all day. Don't skip it.
The braids are the build. Everything else is honestly shopping and prep.
For the crop top, thrift a dark tank top and cut it down. Shower curtain grommets from any hardware store punch in clean and read perfectly on camera. Build the belt rig from faux leather or EVA foam strips. Sew belt loops onto the top with black bias tape so the whole rig moves with you instead of sliding around. Shorts are just cut-off jeans, distressed with sandpaper and dry-brushed with grey and brown fabric paint.
Tattoos take real planning. Mehron water-activated cake paint gives the brightest, most opaque blue you'll get. Cut cardstock stencils for the cloud shapes and dab through them with a sponge. Do not brush. Brushing streaks. Set every section with translucent powder before moving to the next, or the paint transfers to your crop top edge within minutes. The full set is 14+ individual cloud pieces across both arms, shoulders, chest, and stomach. Budget 45 minutes to an hour per application, and apply your tattoos after getting dressed but before the wig goes on (the cap smears fresh paint at the hairline). One thing I learned the weird way: if you flex your elbow while the paint is still tacky, the crease cracks and you get a bare skin line right through the middle of a cloud. Hold your arm straight and fan-dry that inner elbow area for a full minute before bending.
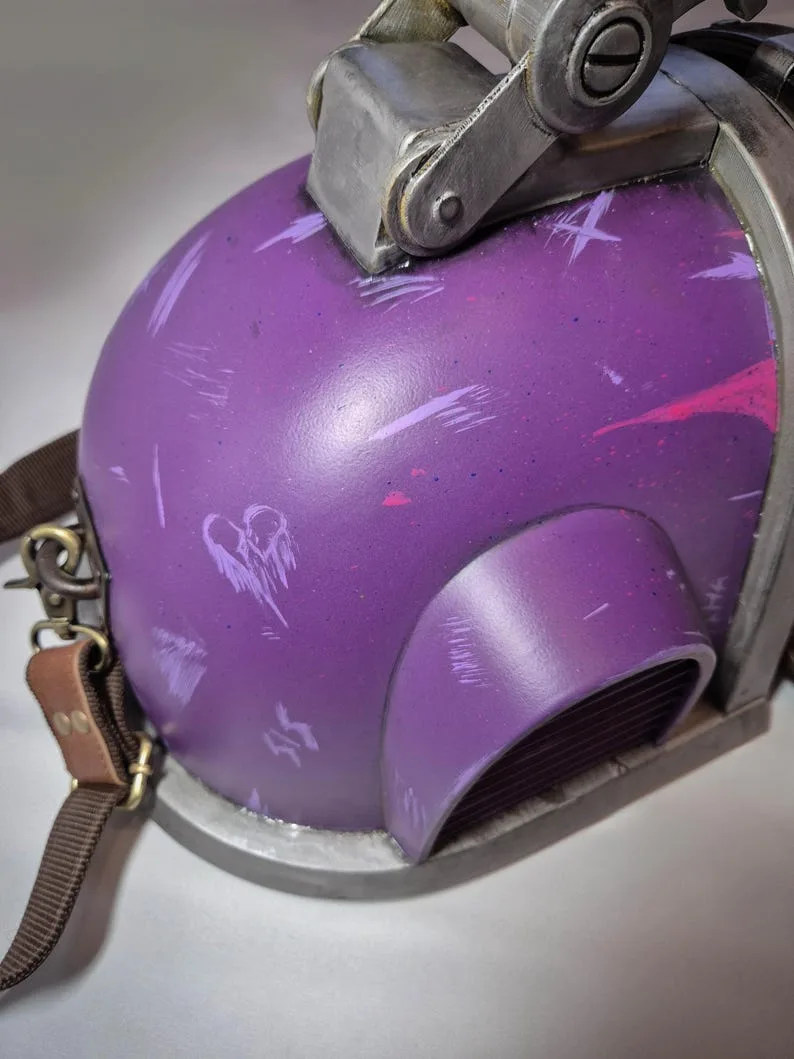
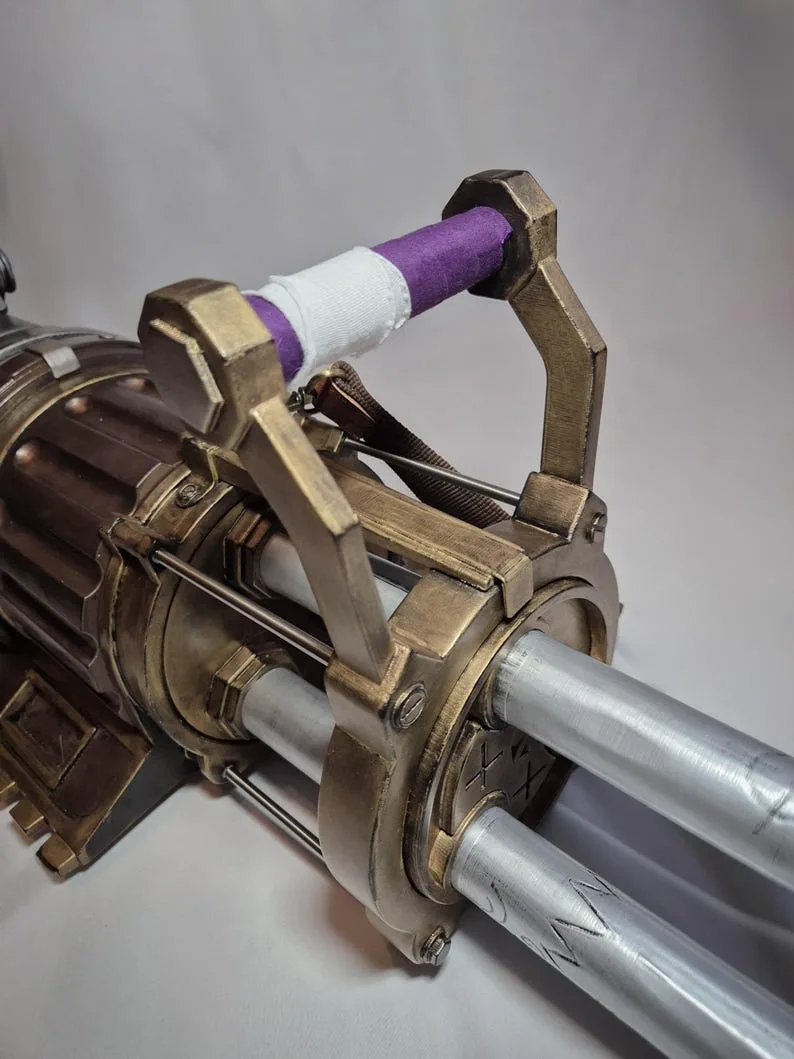
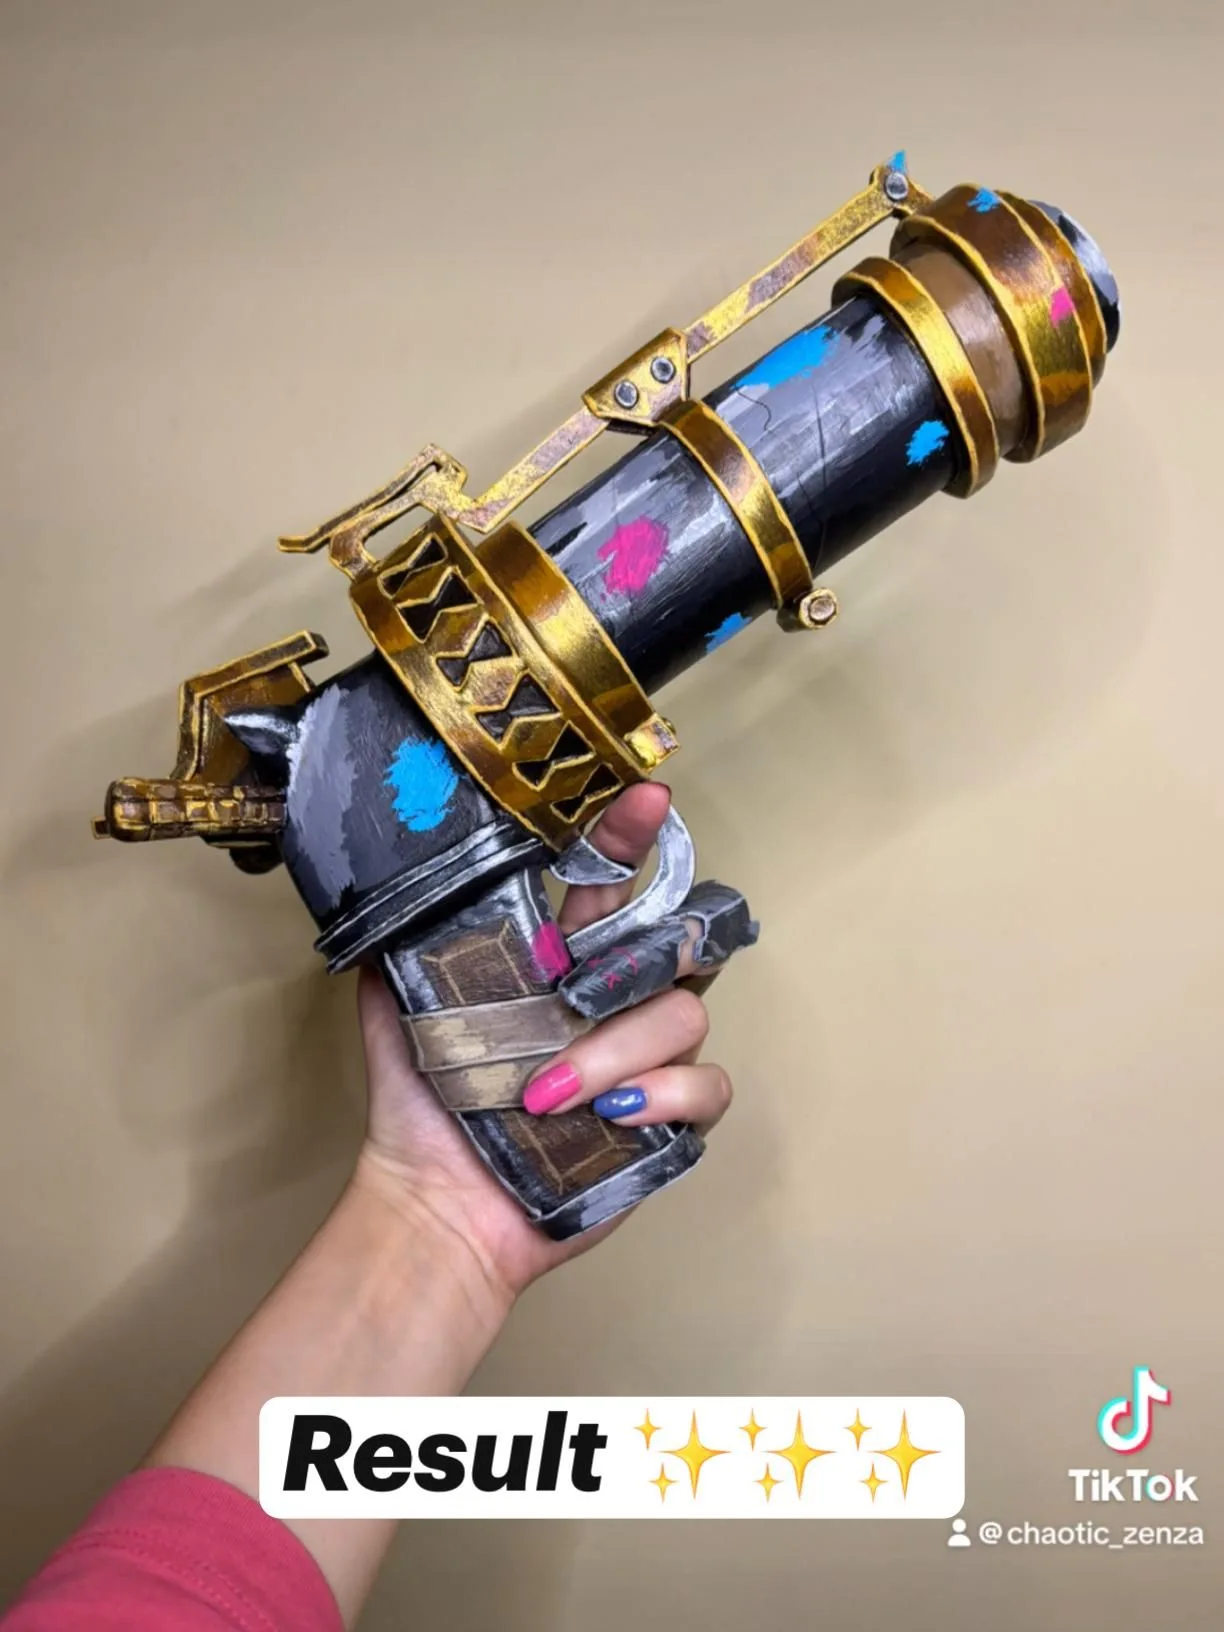
Pow-Pow is optional, but if you're building it, go 70-80% scale in EVA foam (6mm and 10mm sheets) with a PVC pipe spine. A full-scale 3D print can hit 20kg. Foam at reduced scale keeps you under 3kg and clears most con prop policies. Add a shoulder sling. You will regret holding it by hand.
Total budget runs $120 to $320 depending on how much you already own. Boots, body paint, the wig, and Pow-Pow materials are the big cost drivers. The whole build fits in about 6 weeks if you start with the wig (week one, because shipping takes time) and leave tattoo practice and weathering for the end.
Patch-test your body paint 24 hours before the con. Carry a wide-tooth comb and detangler spray in your con bag. Those braids tangle within two hours no matter what you do.
Components
Blue braided wig
Crop top and belt rig
Shorts and leg wraps
Cloud tattoos (arms, shoulders, chest)
Boots
Pow-Pow minigun (optional)
Materials list
15 itemsEstimated total cost
$120 - $320
Milestone timeline
6 weeks- 1
Gather Jinx reference images and pick your version (Arcane S1, S2, or classic LoL)
Research
- 2
Buy and test-fit the wig before styling
Materials
- 3
Braid, secure, and reinforce the twin tails
Construction
- 4
Sew or alter the crop top with grommet detail
Construction
- 5
Build the belt rig and strap system
Construction
- 6
Source and weather the shorts
Construction
- 7
Source and break in boots
Materials
- 8
Practice tattoo application on one arm
Finishing
- 9
Draft Pow-Pow pattern and cut foam pieces
Construction
- 10
Assemble, prime, and paint Pow-Pow
Finishing
- 11
Weather and distress all garment pieces
Details
- 12
Apply tattoos and set with powder
Finishing
- 13
Full suit-up with wig, tattoos, and prop for wear test
Wear test
Frequently
asked questions.
Related tools and guides
Plan your build, estimate costs, and get ready.
Budget Calculator
Estimate your build cost before you start buying materials.
Convention Checklist
88-item packing checklist. Check off items as you pack.
Prop Scaling Calculator
Scale reference images to your body measurements.
How Much Does EVA Foam Armor Cost?
Real build budgets with specific products and dollar amounts.
Cosplay on Costumary
Templates, tools, and workspace built for cosplay makers.
Browse all templates
Explore build plans across 10 craft verticals.
Debut your cosplay build
Upcoming conventions where you could wear this. Dates, checklists, and budget tools included.
San Diego Comic-Con 2026
Jul 23–26 · San Diego, CA
The original and most iconic pop culture convention. Massive panels, Hall H, and the epicenter of entertainment announcements.
OffKai Expo 2026
Jul 24–26 · San Jose, CA
GalaxyCon Raleigh 2026
Jul 24–26 · Raleigh, NC
A Raleigh pop culture convention with celebrity guests, comic artists, and a growing cosplay scene.
Lakeland Anime-Fest 2026
Jul 25–25 · Lakeland, FL
Start this build free
Clone this template into your workspace. Track materials, milestones, budget, and build progress in one place.
More from this series
Qifrey Cosplay
5 weeks · 12 milestones
Qifrey's elegant white-robed silhouette is built around three signature elements: the tall pointed hat with the bent tip and black ribbon, the flowing white cape with the brass brooch closure, and the asymmetrical pince-nez glasses with one dark lens hiding his scarred eye. This is an intermediate build that needs more structural crafting than sewing. The hat and glasses demand the most attention, while the cape is a manageable garment project. The glasses and the hat are the make-or-break details, and this template walks you through both. Includes 7 components, 15 materials with cost estimates, a 12-step build plan, and a realistic 5-week, $95 to $280 budget.
Coco Cosplay
6 weeks · 12 milestones
Witch Hat Atelier's apprentice witch in her full outfit: the tall pointed hat with ornamental band, a dark cloak with decorative hem trim, a layered tunic-dress, boots, and her drawing implements. The hat is the signature piece and the hardest to get right. 7 components, 13 materials, ~6 weeks at $120-280.
Gojo Satoru Cosplay
5 weeks · 11 milestones
Jujutsu Kaisen's strongest sorcerer, built around three signature details: the black high-collar uniform jacket, the blindfold, and the white spiked hair. This is an intermediate build that leans on one well-made garment plus wig styling, so it reads instantly on the con floor without months of work. The collar and the wig are the make-or-break details, and this template walks you through both. Includes 6 components, 11 materials with cost estimates, an 11-step build plan, and a realistic 5-week, $90 to $240 budget.
Frieren Cosplay
5 weeks · 12 milestones
Frieren: Beyond Journey's End's elven mage, built around a white high-collar tunic with gold trim, a flowing blue cape, and a wooden staff with a red gem. This is an intermediate build that combines clean garment construction with prop craftsmanship, finished with styled twin-tail wig and elf ear prosthetics. The gold trim detailing and the staff are the signature details, and this template walks you through both. Includes 7 components, 14 materials with cost estimates, a 12-step build plan, and a realistic 5-week, $100 to $280 budget.