
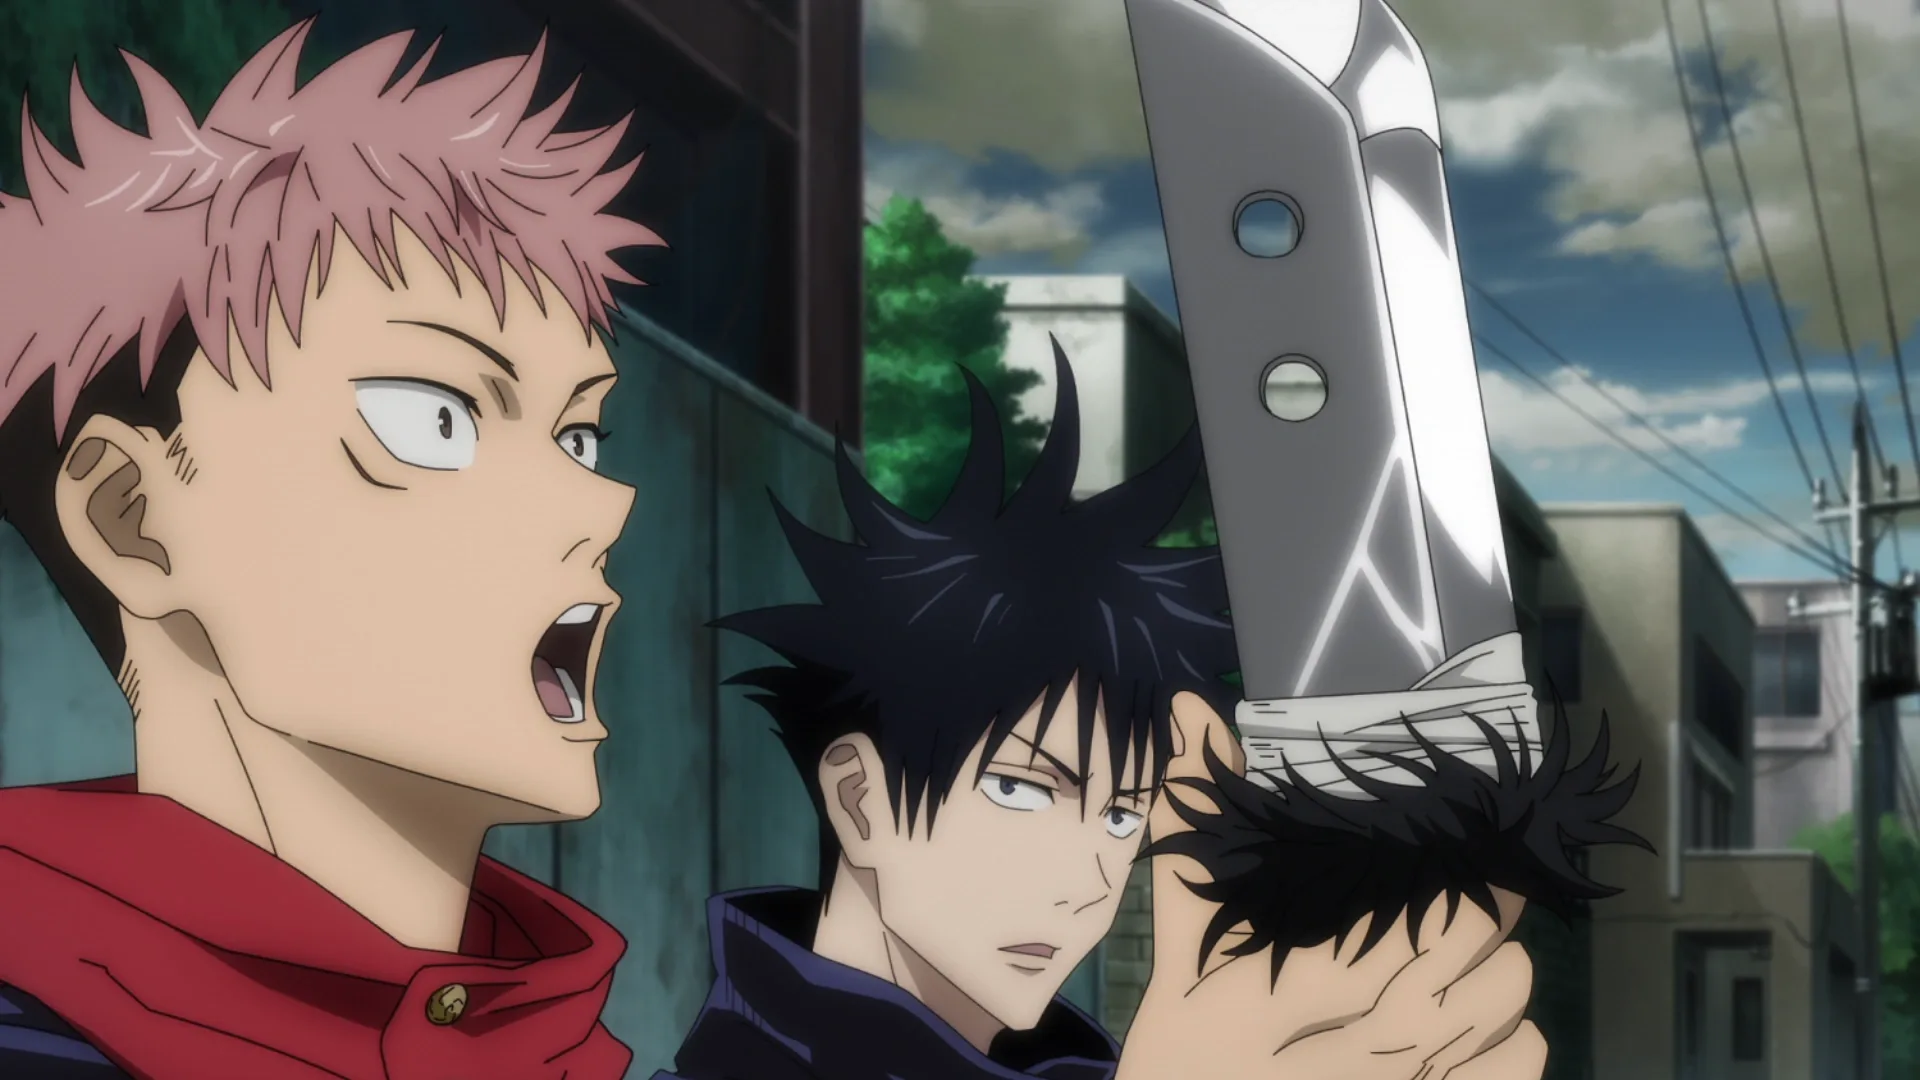
Yuji Itadori Cosplay
Jujutsu High's unassuming sorcerer-in-training: the pink-and-black undercut wig, white school uniform, and subtle Sukuna curse marks. The wig styling is the make-or-break challenge—it needs proper teasing, gel, and heat-setting to hold spikes through a con day. 4 components, 10 materials, 3-4 weeks, $75-150.
3 weeks
10
10
4
See the whole look before you start.
References, materials, budget, and build order for Yuji Itadori.
Timeline
3 weeks
Color refs


Materials
10 items
Budget
$75 - $150
save the visual refs
Full reference board
The preview above is curated for scanning. This is the working board you clone into your own build, with notes, colors, product images, and extra references intact.
Images are sourced from around the internet to help you get started. Use the web clipper to build your own reference library.
Build guide
I ordered a cheap synthetic wig for Itadori and spent six hours trying to heat-style it before giving up. The fibers wouldn't set, they kept frizzing back the moment I touched them, and by the time I realized the whole approach was doomed, I was out 30 dollars and two days. That's the first lesson: don't cheap out on the wig. This cosplay lives or dies on the wig, and there's no negotiating that.
Here's why. Itadori's whole silhouette is the undercut, that spiky, fluffy top sitting on a tightly faded underside. It's not a wig you can just put on and walk around in. It needs aggressive teasing at the roots (and I mean aggressive, not surface-level fluffing), it needs a strong-hold gel applied by hand to individual sections, and it needs to be heat-set with a flat iron right before you head to the con floor. A low-quality synthetic wig won't hold any of that. The fibers break down under heat or just give up and fall flat. You spend 45 minutes styling it and get 90 minutes of wear before the whole thing collapses back down.
Invest in Arda Wigs' Kai or Epic Cosplay's Yujie. Both are heat-resistant, both come in the soft pink-to-black gradient that matches the show, and both hold spikes through a full con day with touch-ups. You're spending 65 to 70 dollars on a wig instead of 25. Expensive. Worth it. The color accuracy alone justifies it, but you're also buying durability and the ability to actually style the character. If you're still on the fence, order a cheap one, destroy it by attempting to style it, then buy the good one. You'll spend the same money and get the same conclusion.
Once you have the right wig, the technique is straightforward. Get a wig stand (15 dollars), a pack of T-pins (5 dollars), a bottle of Got2b Glued (7 dollars), and a flat iron if you don't already own one. The flat iron matters because you want control over heat and pressure. A heat gun is too aggressive and will actually singe the fibers. Tease the crown section by section, working from roots outward, then brush through gently to keep the volume but shape it. Apply gel to individual strands or small groups (not the whole wig at once—that creates an off-putting sticky helmet look). Once styled, run the flat iron over the spikes on low heat to set them. Practice this twice on a wig stand before the convention. You'll know your timing and rhythm, and you'll be confident enough to nail it on con day.
The uniform is easy, almost an afterthought. The jacket matters more than the shirt or pants. Buy a commercial Etsy pattern (JJK pattern sets run 25 dollars as a PDF) or thrift a black jacket and tailor it. The white shirt can be any crisp white button-up. Black pants are black pants. The visual anchor is the jacket—that's where the silhouette happens. Spend your sewing time there if you're making from scratch, or make sure the fit is right if you're thrifting.
Makeup is the forgettable detail that actually matters. The Sukuna curse marks on Itadori's face are subtle, pinkish-purple lines around the eyes and cheeks. They're easy to overlook, but they complete the look. Use water-activated face paint (Snazaroo, 12 dollars) with a fine-tip brush. Prime your face first so the paint adheres, then set it with setting spray. Apply marks about 30 minutes before you head to the con floor so they're fresh. Bring the paint and a brush in your pocket for touch-ups. This whole step takes maybe 10 minutes once you've practiced, and it's the difference between looking like a guy in a school uniform and looking like Itadori.
Con day is straightforward if you prepare. Pack a small pouch: bobby pins, a travel-size gel, the flat iron or a small cordless one, and the makeup kit. Your wig will need one touch-up midday, maybe two if you're sweating or indoors with heating. Five to ten minutes of work maintains it. Do a full wear test at home for at least two hours before the convention. Check how the wig sits with the jacket collar. Confirm the shoes are actually comfortable for eight hours of walking. Wear the whole thing and move around. You'll catch fit issues now instead of at a convention floor with three hours to solve them.
Skill level wise, this is beginner-friendly. You're not carving foam or hand-stitching armor. You're styling a wig and wearing a school uniform. What makes it work is precision in the wig department and following the care checklist. That's it.
Components
Pink-and-black undercut wig
School uniform (jacket, shirt, pants)
Sukuna curse marks (face makeup)
Shoes and accessories
Materials list
10 itemsEstimated total cost
$75 - $150
Milestone timeline
3 weeks- 1
Gather reference images and lock Itadori version
Research
- 2
Order heat-resistant wig with custom styling notes
Materials
- 3
Decide on uniform: buy commercial pattern or thrift base
Patterning
- 4
If sewing jacket: source fabric and cut pattern pieces
Patterning
- 5
Sew or source school uniform jacket, shirt, pants
Construction
- 6
Receive wig and test-fit on wig stand
Construction
- 7
Tease wig crown and sides, apply gel, heat-set spikes
Finishing
- 8
Practice Sukuna curse mark makeup application on camera
Finishing
- 9
Full costume wear test: wig, uniform, shoes, makeup
Wear test
- 10
Test wig stability under wig cap and collar pressure for 2 hours
Wear test
Frequently
asked questions.
Related tools and guides
Plan your build, estimate costs, and get ready.
Budget Calculator
Estimate your build cost before you start buying materials.
Convention Checklist
88-item packing checklist. Check off items as you pack.
Prop Scaling Calculator
Scale reference images to your body measurements.
How Much Does EVA Foam Armor Cost?
Real build budgets with specific products and dollar amounts.
Cosplay on Costumary
Templates, tools, and workspace built for cosplay makers.
Browse all templates
Explore build plans across 10 craft verticals.
Debut your cosplay build
Upcoming conventions where you could wear this. Dates, checklists, and budget tools included.
Start this build free
Clone this template into your workspace. Track materials, milestones, budget, and build progress in one place.
More from this series
Qifrey Cosplay
5 weeks · 12 milestones
Qifrey's elegant white-robed silhouette is built around three signature elements: the tall pointed hat with the bent tip and black ribbon, the flowing white cape with the brass brooch closure, and the asymmetrical pince-nez glasses with one dark lens hiding his scarred eye. This is an intermediate build that needs more structural crafting than sewing. The hat and glasses demand the most attention, while the cape is a manageable garment project. The glasses and the hat are the make-or-break details, and this template walks you through both. Includes 7 components, 15 materials with cost estimates, a 12-step build plan, and a realistic 5-week, $95 to $280 budget.
Coco Cosplay
6 weeks · 12 milestones
Witch Hat Atelier's apprentice witch in her full outfit: the tall pointed hat with ornamental band, a dark cloak with decorative hem trim, a layered tunic-dress, boots, and her drawing implements. The hat is the signature piece and the hardest to get right. 7 components, 13 materials, ~6 weeks at $120-280.
Gojo Satoru Cosplay
5 weeks · 11 milestones
Jujutsu Kaisen's strongest sorcerer, built around three signature details: the black high-collar uniform jacket, the blindfold, and the white spiked hair. This is an intermediate build that leans on one well-made garment plus wig styling, so it reads instantly on the con floor without months of work. The collar and the wig are the make-or-break details, and this template walks you through both. Includes 6 components, 11 materials with cost estimates, an 11-step build plan, and a realistic 5-week, $90 to $240 budget.
Denji Cosplay
10 weeks · 15 milestones
Chainsaw Man's protagonist in his iconic hybrid form: the human body with a chainsaw head and transformable chainsaw arms. The hand-carved foam helmet with chain-link detailing is the make-or-break piece, demanding precision foam work and 8-12 weeks of dedicated building. A full build includes the school uniform base, prosthetic teeth, spiky hair, and the chainsaw arms or helmet. 6 components, 14 materials, ~10 weeks, $200-500.