
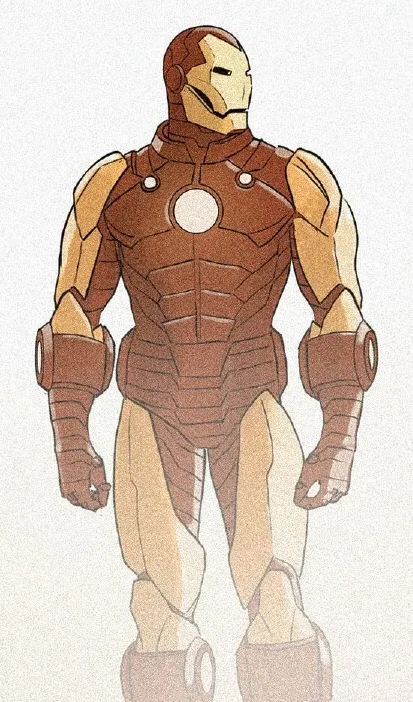
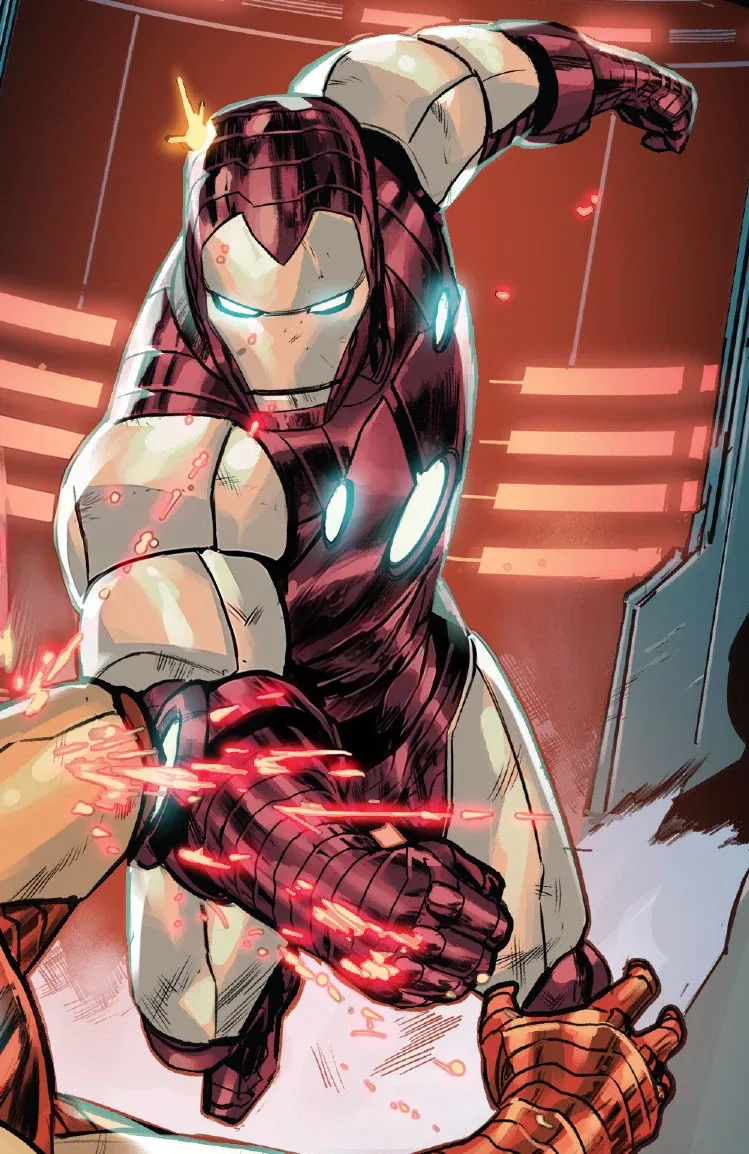
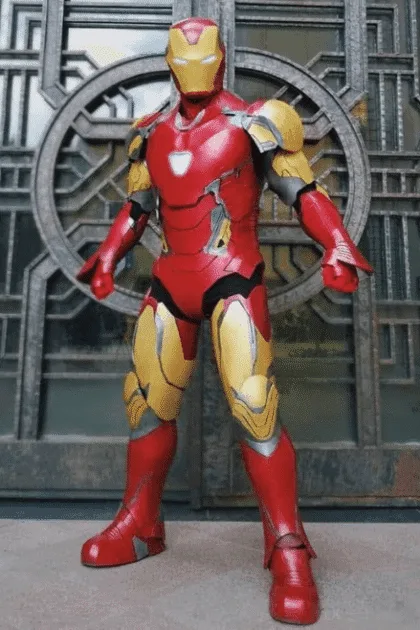
Iron Man Mark III Armor Cosplay
The iconic red and gold Mark III armor: full EVA foam plate construction with a hinged faceplate helmet, glowing arc reactor, and metallic automotive paint finish. This is an advanced build with 7 major components spanning foam shaping, basic electronics, and multi-layer painting. Covers materials, a 14-step build plan across 5 phases, and a realistic 8-week, $200 to $550 budget.
8 weeks
14
15
7
See the whole look before you start.
References, materials, budget, and build order for Iron Man.
Timeline
8 weeks
Color refs
Materials
15 items
Budget
$200 - $550
save the visual refs
Full reference board
The preview above is curated for scanning. This is the working board you clone into your own build, with notes, colors, product images, and extra references intact.
Images are sourced from around the internet to help you get started. Use the web clipper to build your own reference library.
Build guide
The helmet will make or break this build. Not the foam shaping, not the LED eyes. The hinge. I've seen probably thirty Iron Man helmets at cons where the faceplate doesn't flip cleanly because the builder mounted the pivot at the forehead instead of the temple line. You need that up-and-back arc, and you get it by epoxying two small hinges together at the temples with Chicago screws set in Apoxie Sculpt. I drilled through three helmet shells before I got the placement right on my fourth Mark III.
Forget the helmet for now though. Start with paint.
I'm serious. The number one thing that separates a $200 Halloween costume from a $500 cosplay-grade Iron Man suit is the paint job, and you cannot rush it. You need 3-5 coats of Flexbond on every single piece before primer touches foam. I do my sealing in batches across three days. Then gloss black primer (two thin coats, not one heavy coat), then your metallics. The community settled on Duplicolor Dark Cherry Metallic for the red and Duplicolor Sunburst Gold years ago and I've never found anything better. I picked up four cans of each at the O'Reilly Auto Parts on Sepulveda in Torrance last spring because they consistently stock Duplicolor when AutoZone doesn't.
Paint in a garage or outside. Never in your living space. And here's what nobody tells you: metallic paint looks completely different under fluorescent convention lighting versus your garage. Spray a test panel and bring it to a Home Depot. Stand under their overhead lights. The red will look darker and the gold will go flat. If you're not happy under fluorescents, add another mist coat of the metallic.
The 2K clear coat is non-negotiable. It's $28 for one can and it makes EVA foam look like actual metal. But 2K is a one-shot deal. Once you crack that can, you have about 48 hours before it hardens inside. Use it all, cure for two full days, don't touch anything.
On foam: I burned through a 6-pack of 10mm floor mats and three packs of 6mm sheets. Budget $55-60 just for foam. The whole build ran me about $420 because I already had a heat gun and contact cement. If you're buying tools from scratch, you're looking at the $500-550 range.
Scaling will frustrate you. Pepakura's exploded view dimensions don't match assembled dimensions, and every single body is different. Print your template pieces on cardstock first. Tape them to your body. My first chest plate was 4cm too narrow because I forgot that 10mm foam on both interior walls eats 20mm of clearance. Add 3cm to every circumference measurement. Do this before you cut a single piece of EVA.
The arc reactor is actually the fun part. A WS2812B LED ring with an Arduino Nano running a pulse animation looks incredible and draws less power than constant-on LEDs. Run a JST extension cable down to a battery pack in your pocket. Eight hours of runtime, no visible bulk.
Timeline is 8 weeks if you're disciplined about dry time. Most of that is waiting. Waiting for Flexbond to cure, waiting for primer, waiting for metallics, waiting for clear coat. The actual cutting and gluing is maybe 3 weeks of evenings. The rest is patience.
One more thing: make the cod piece removable. Side-release buckles. Trust me. A full suit takes 15-20 minutes to strip and you will need a bathroom at some point during a 6-hour con day. I learned this at Anime Expo 2023 and I don't want to talk about it further.
Components
Helmet with hinged faceplate
Chest and back plates with arc reactor
Shoulder pauldrons and upper arms
Forearm gauntlets with hand plates
Thigh and knee armor
Shin greaves and boot covers
Cod piece and hip armor
Materials list
15 itemsEstimated total cost
$200 - $550
Milestone timeline
8 weeks- 1
Choose your Mark version and gather reference images from multiple angles
Research
- 2
Purchase foam templates and print test pieces in cardstock
Research
- 3
Scale all template pieces to your body measurements with clearance
Patterning
- 4
Cut and heat-shape helmet shell, test faceplate fit
Construction
- 5
Build chest and back plates with arc reactor cutout
Construction
- 6
Construct shoulder, arm, and gauntlet pieces
Construction
- 7
Build thigh, knee, shin, and boot armor
Construction
- 8
Assemble cod piece and hip plates on belt mount
Construction
- 9
Seal all pieces with 3-5 coats of Flexbond
Finishing
- 10
Prime with gloss black, then apply metallic red and gold coats
Finishing
- 11
Apply 2K clear coat and let cure 48 hours
Finishing
- 12
Wire arc reactor and helmet LED electronics, test
electronics
- 13
Install all strapping, velcro, and closure hardware
assembly
- 14
Full suit-up with handler, mobility test, and photo check
Wear test
Frequently
asked questions.
Related tools and guides
Plan your build, estimate costs, and get ready.
Budget Calculator
Estimate your build cost before you start buying materials.
Convention Checklist
88-item packing checklist. Check off items as you pack.
Prop Scaling Calculator
Scale reference images to your body measurements.
How Much Does EVA Foam Armor Cost?
Real build budgets with specific products and dollar amounts.
Cosplay on Costumary
Templates, tools, and workspace built for cosplay makers.
Browse all templates
Explore build plans across 10 craft verticals.
Debut your cosplay build
Upcoming conventions where you could wear this. Dates, checklists, and budget tools included.
San Diego Comic-Con 2026
Jul 23–26 · San Diego, CA
The original and most iconic pop culture convention. Massive panels, Hall H, and the epicenter of entertainment announcements.
OffKai Expo 2026
Jul 24–26 · San Jose, CA
GalaxyCon Raleigh 2026
Jul 24–26 · Raleigh, NC
A Raleigh pop culture convention with celebrity guests, comic artists, and a growing cosplay scene.
Lakeland Anime-Fest 2026
Jul 25–25 · Lakeland, FL
Start this build free
Clone this template into your workspace. Track materials, milestones, budget, and build progress in one place.
More from this series
Qifrey Cosplay
5 weeks · 12 milestones
Qifrey's elegant white-robed silhouette is built around three signature elements: the tall pointed hat with the bent tip and black ribbon, the flowing white cape with the brass brooch closure, and the asymmetrical pince-nez glasses with one dark lens hiding his scarred eye. This is an intermediate build that needs more structural crafting than sewing. The hat and glasses demand the most attention, while the cape is a manageable garment project. The glasses and the hat are the make-or-break details, and this template walks you through both. Includes 7 components, 15 materials with cost estimates, a 12-step build plan, and a realistic 5-week, $95 to $280 budget.
Coco Cosplay
6 weeks · 12 milestones
Witch Hat Atelier's apprentice witch in her full outfit: the tall pointed hat with ornamental band, a dark cloak with decorative hem trim, a layered tunic-dress, boots, and her drawing implements. The hat is the signature piece and the hardest to get right. 7 components, 13 materials, ~6 weeks at $120-280.
Gojo Satoru Cosplay
5 weeks · 11 milestones
Jujutsu Kaisen's strongest sorcerer, built around three signature details: the black high-collar uniform jacket, the blindfold, and the white spiked hair. This is an intermediate build that leans on one well-made garment plus wig styling, so it reads instantly on the con floor without months of work. The collar and the wig are the make-or-break details, and this template walks you through both. Includes 6 components, 11 materials with cost estimates, an 11-step build plan, and a realistic 5-week, $90 to $240 budget.
Frieren Cosplay
5 weeks · 12 milestones
Frieren: Beyond Journey's End's elven mage, built around a white high-collar tunic with gold trim, a flowing blue cape, and a wooden staff with a red gem. This is an intermediate build that combines clean garment construction with prop craftsmanship, finished with styled twin-tail wig and elf ear prosthetics. The gold trim detailing and the staff are the signature details, and this template walks you through both. Includes 7 components, 14 materials with cost estimates, a 12-step build plan, and a realistic 5-week, $100 to $280 budget.