
Chun-Li Cosplay
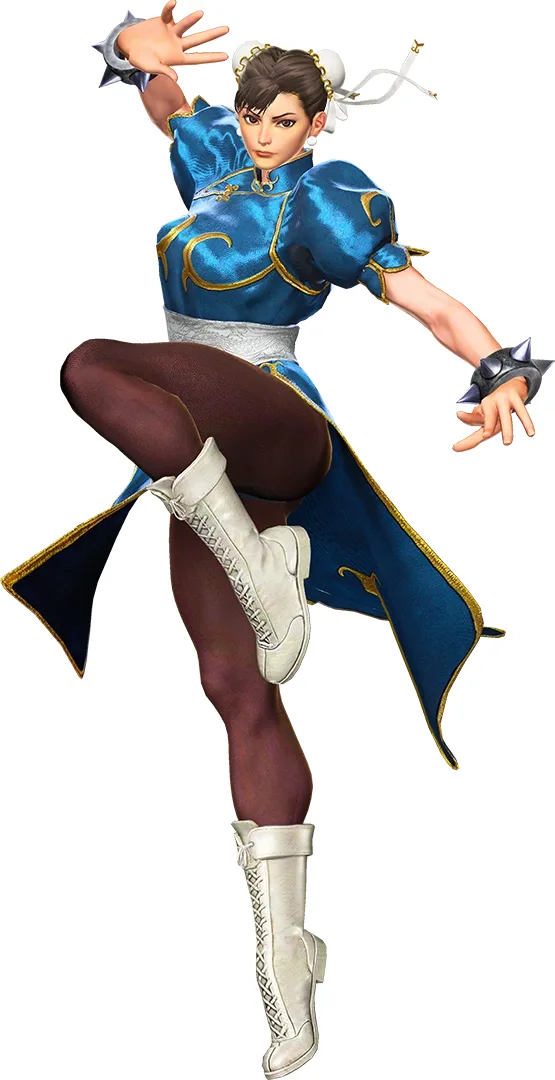
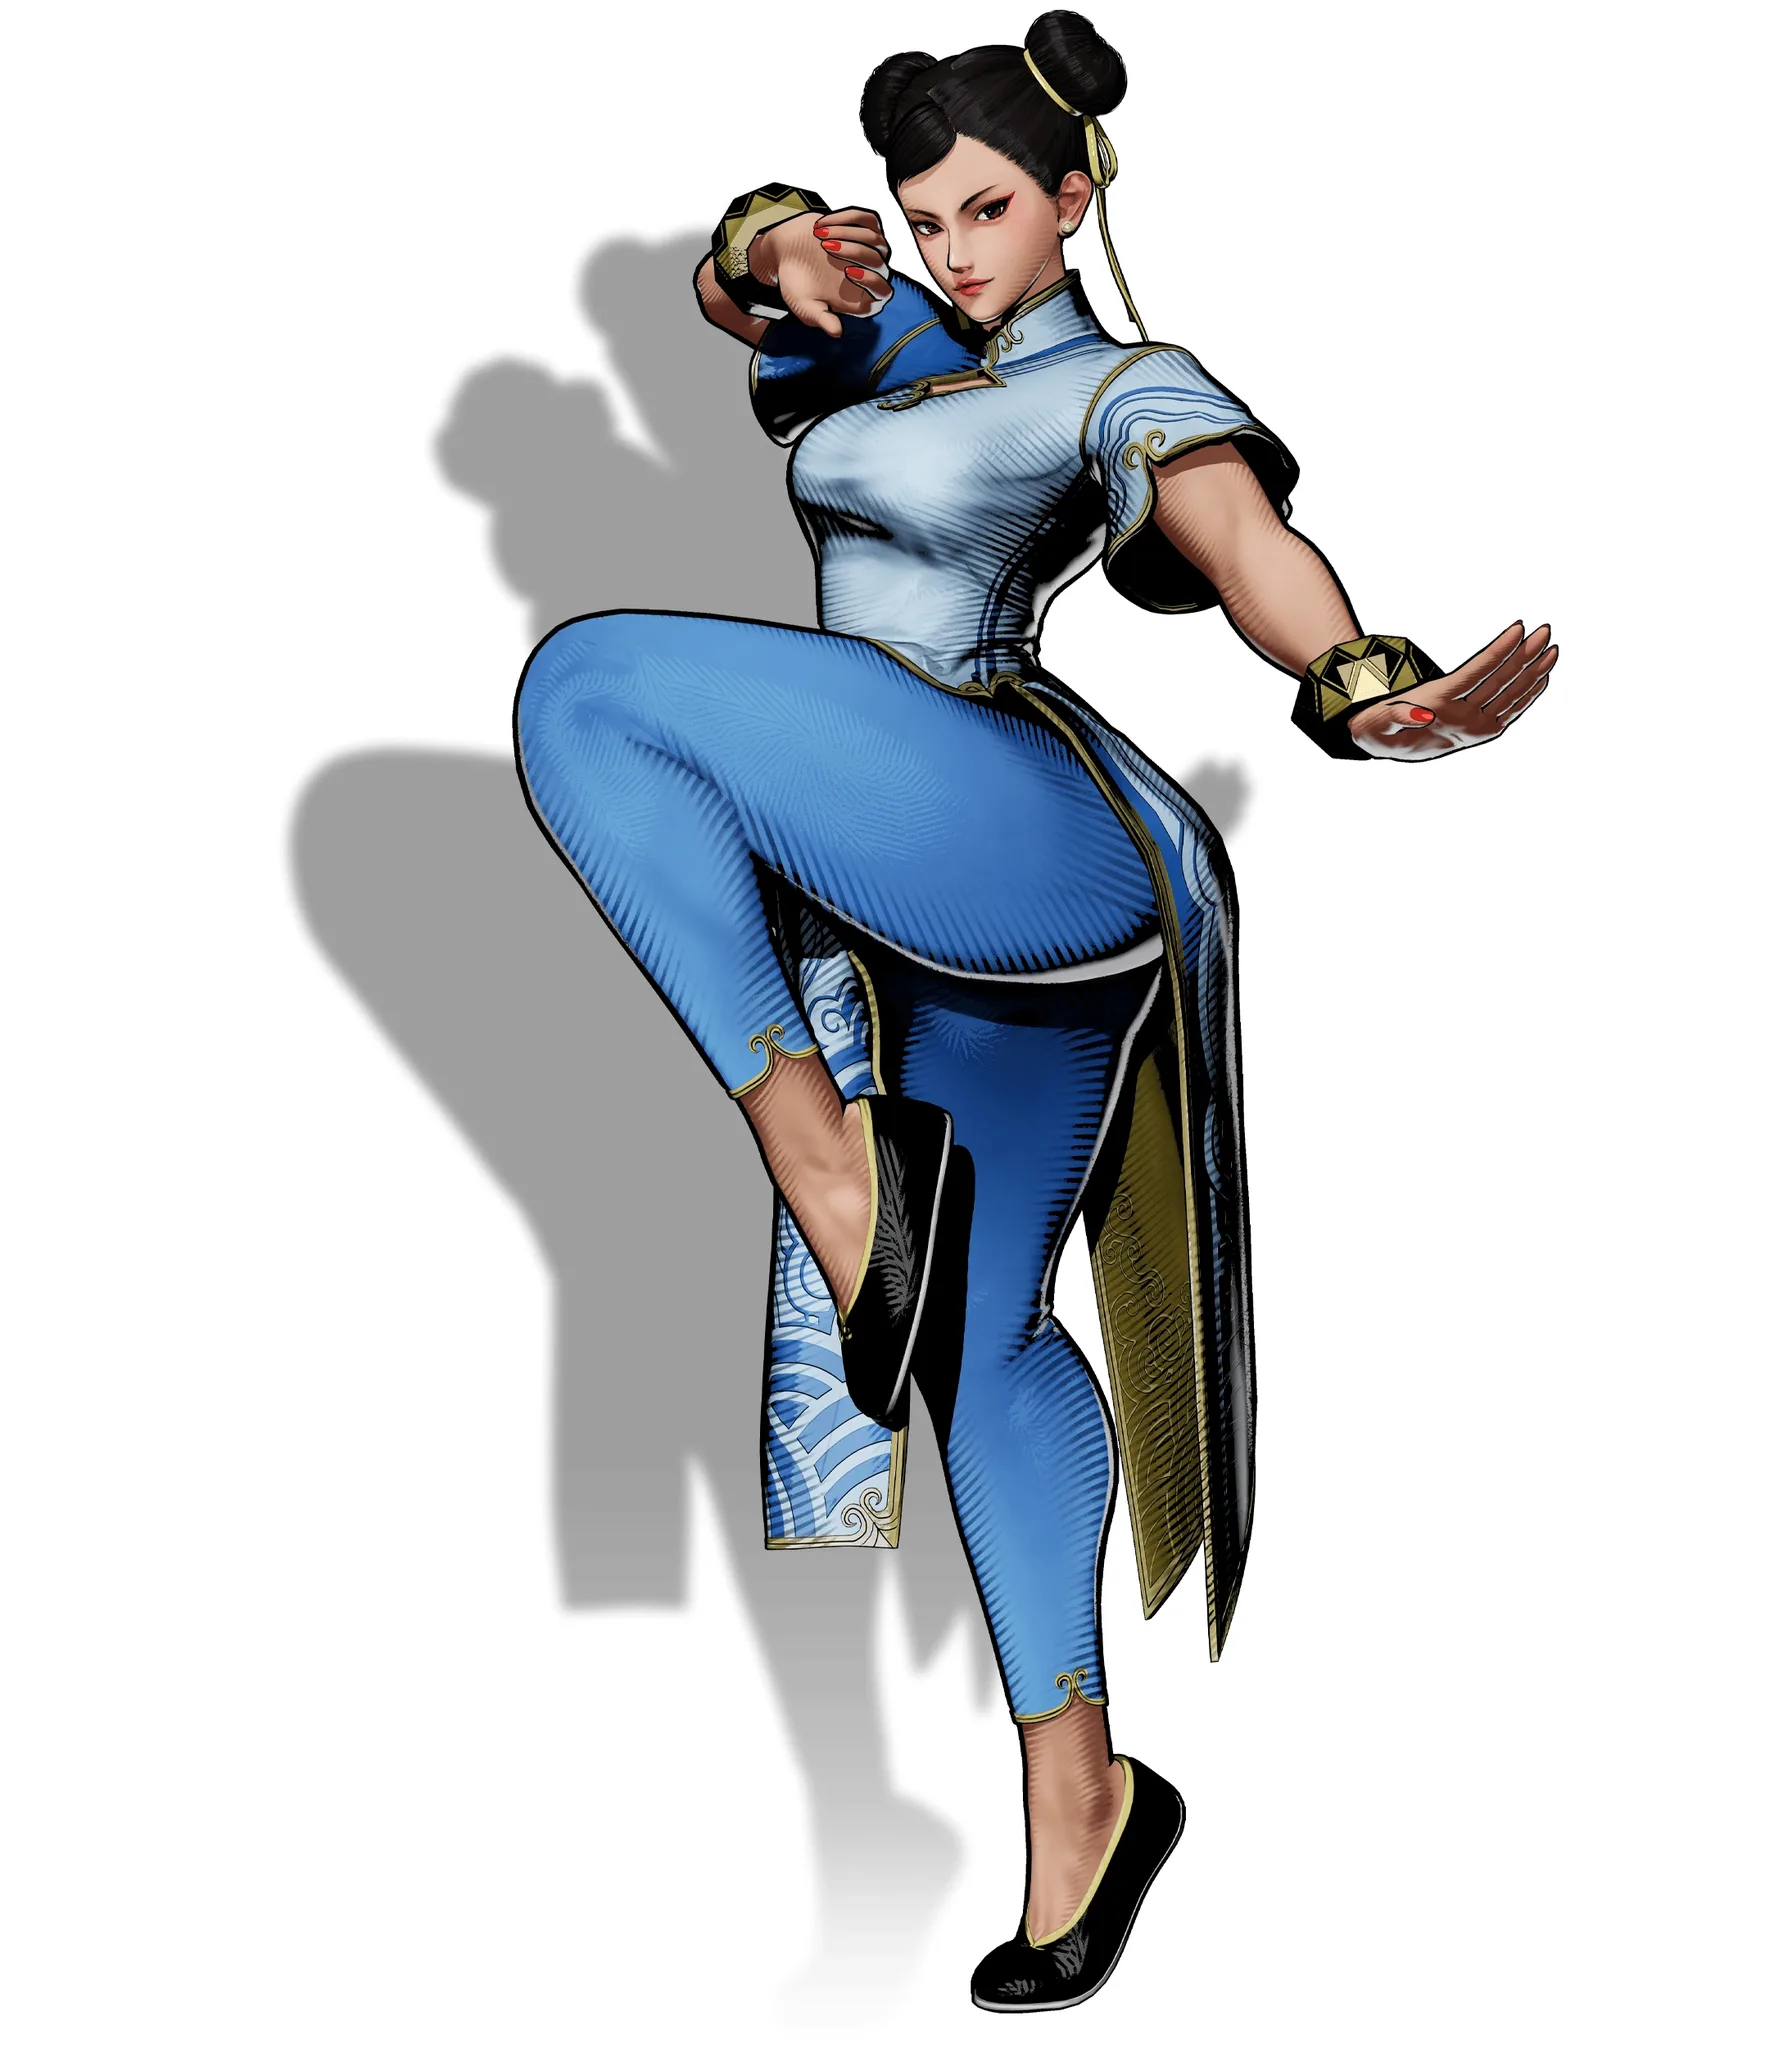
Street Fighter's iconic martial artist in sky blue silk with the signature heavy twin buns, high-slit qipao dress, red belt with gold accents, and spiked wrist bracelets. The bun wig is the make-or-break piece—it needs reinforced anchoring to hold through a full con day. 6 components, 12 materials, about 5 weeks, $95 to $250.
5 weeks
13
12
6
See the whole look before you start.
References, materials, budget, and build order for Chun-Li.
Timeline
5 weeks
Color refs


Materials
12 items
Budget
$95 - $250
save the visual refs
Full reference board
The preview above is curated for scanning. This is the working board you clone into your own build, with notes, colors, product images, and extra references intact.
Images are sourced from around the internet to help you get started. Use the web clipper to build your own reference library.
Build guide
The wig buns almost tanked my first Chun-Li at Colossalcon 2024. I spent three weeks on the dress, the belt, the bracelets, everything perfect, and then I showed up Friday morning and the buns were sliding backward by noon. I'd clipped them once to the wig cap and called it done. Never again.
Now I know the buns are the entire build. Not the dress. Not the bracelets. The buns. Every Chun-Li on the convention floor succeeds or fails based on whether those twin buns stay anchored through six hours of walking, posing, and photos. You could sew a flawless qipao and still look incomplete if the wig is sliding or drooping.
Start by buying a pre-styled twin-bun wig. Don't try to style separate buns from a blank wig, the proportions are impossible to get right. I've seen cosplayers spend $25 on a blank wig and $30 on styling to end up with buns that look lumpy or unbalanced. Spend $35 on a bun wig that comes pre-shaped. I bought mine from Wig Wonderland on Etsy in May and they came perfectly proportioned right out of the box.
Anchoring is everything. Sew mini wig combs (4-6 of them, depending on bun size) into the inner base of each bun so they grip into the wig cap's wefts, not just the hair. Then use the X-clip method: cross two heavy-duty bobby pins under the wefts on each side of each bun. Some builders add a penny inside the bun for counterweight to stop backward sliding. Test by shaking your head hard, looking down sharply, bending over. If either bun moves, add another anchor.
The dress is straightforward for intermediate sewers. Buy sky blue silk charmeuse or satin, not polyester. I made that mistake once and the fabric wrinkled before I even got to the convention. This time I ordered from the Joann in Torrance, CA, and spent $45 on actual silk. The difference is instant, it photographs so much better. The qipao construction is basic: fitted bodice, standing collar, invisible zipper in the back, and high side slits for mobility. Aim for slits from the hem up to high-thigh level, about 6-8 inches wide from the center seam.
The red belt with gold trim is where people cut corners and it shows. Make it from stretch fabric with heavyweight interfacing or buckram inside so it doesn't droop. A limp red belt ruins the silhouette. Interface it properly, add gold bias tape to the top and bottom edges, and it'll hold shape all day.
The spiked bracelets are simple foam-and-paint but fragile if built wrong. Use EVA foam 3-4mm for the rings and spikes. Skip hot glue, it fails immediately. Use Gorilla Glue for attachment, fill gaps with Kwik Seal caulk, prime with three coats, paint with two coats of silver acrylic. Test-wear at home for 2-3 hours to catch weak joints before the con.
White boots and tights are straightforward but matter for all-day comfort. Buy heeled cosplay boots with cushioned footbeds and reinforced ankles ($50+). Break them in for two weeks before the convention by wearing them around the house. Get high-quality nylon-spandex tights (40-60 denier) that won't snag or ladder. Bring a backup pair.
Total cost: $95 to $250 depending on fabric and boot quality. About 5 weeks at a comfortable pace. It's intermediate because of the sewing and wig anchoring, but you can absolutely handle it if you've made one garment before.
Components
Blue silk qipao dress with side slits
Twin bun wig with reinforced anchoring
Red belt with gold trim
Spiked wrist bracelets (pair)
White or cream tights
White heeled boots
Materials list
12 itemsEstimated total cost
$95 - $250
Milestone timeline
5 weeks- 1
Gather Chun-Li references and decide on your version
Research
- 2
Source blue silk fabric in person and test color against character art
Materials
- 3
Buy and test the wig for fit, weight, and bun proportions
Materials
- 4
Draft or source a qipao/cheongsam pattern with slit plackets
Patterning
- 5
Mock up the collar and slit placement in muslin or scrap
Patterning
- 6
Cut and sew the dress body with invisible zipper
Construction
- 7
Interface and attach the standing collar
Construction
- 8
Finish dress slit edges with bias tape or French seams
Details
- 9
Make and fit the red belt with gold trim
Details
- 10
Build foam wrist bracelets and prime and paint spikes
Details
- 11
Sew wig combs into the bun base and practice X-clip anchoring method
Finishing
- 12
Break in white boots and test standing, walking, and posing
Fitting
- 13
Full dress rehearsal with wig stability test and movement check
Wear test
Frequently
asked questions.
Related tools and guides
Plan your build, estimate costs, and get ready.
Budget Calculator
Estimate your build cost before you start buying materials.
Convention Checklist
88-item packing checklist. Check off items as you pack.
Prop Scaling Calculator
Scale reference images to your body measurements.
How Much Does EVA Foam Armor Cost?
Real build budgets with specific products and dollar amounts.
Cosplay on Costumary
Templates, tools, and workspace built for cosplay makers.
Browse all templates
Explore build plans across 10 craft verticals.
Debut your cosplay build
Upcoming conventions where you could wear this. Dates, checklists, and budget tools included.
Start this build free
Clone this template into your workspace. Track materials, milestones, budget, and build progress in one place.
More from this series
Qifrey Cosplay
5 weeks · 12 milestones
Qifrey's elegant white-robed silhouette is built around three signature elements: the tall pointed hat with the bent tip and black ribbon, the flowing white cape with the brass brooch closure, and the asymmetrical pince-nez glasses with one dark lens hiding his scarred eye. This is an intermediate build that needs more structural crafting than sewing. The hat and glasses demand the most attention, while the cape is a manageable garment project. The glasses and the hat are the make-or-break details, and this template walks you through both. Includes 7 components, 15 materials with cost estimates, a 12-step build plan, and a realistic 5-week, $95 to $280 budget.
Coco Cosplay
6 weeks · 12 milestones
Witch Hat Atelier's apprentice witch in her full outfit: the tall pointed hat with ornamental band, a dark cloak with decorative hem trim, a layered tunic-dress, boots, and her drawing implements. The hat is the signature piece and the hardest to get right. 7 components, 13 materials, ~6 weeks at $120-280.
Gojo Satoru Cosplay
5 weeks · 11 milestones
Jujutsu Kaisen's strongest sorcerer, built around three signature details: the black high-collar uniform jacket, the blindfold, and the white spiked hair. This is an intermediate build that leans on one well-made garment plus wig styling, so it reads instantly on the con floor without months of work. The collar and the wig are the make-or-break details, and this template walks you through both. Includes 6 components, 11 materials with cost estimates, an 11-step build plan, and a realistic 5-week, $90 to $240 budget.
Denji Cosplay
10 weeks · 15 milestones
Chainsaw Man's protagonist in his iconic hybrid form: the human body with a chainsaw head and transformable chainsaw arms. The hand-carved foam helmet with chain-link detailing is the make-or-break piece, demanding precision foam work and 8-12 weeks of dedicated building. A full build includes the school uniform base, prosthetic teeth, spiky hair, and the chainsaw arms or helmet. 6 components, 14 materials, ~10 weeks, $200-500.