
Cartethyia Cosplay
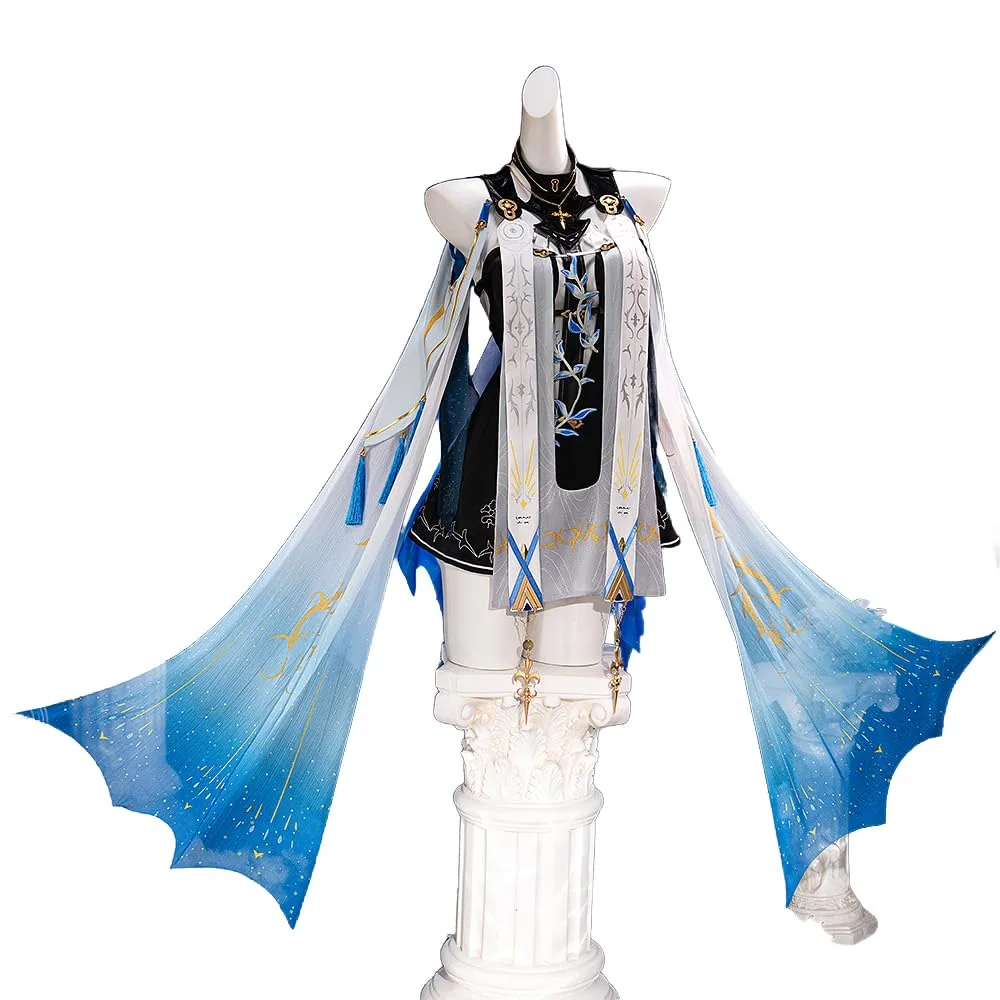
Wuthering Waves' Blessed Maiden in her signature layered silhouette: a form-fitting black undersuit with white tabard overlay, weighted shoulder stole panels, long floating sleeve panels draping to the knees, and an elaborate multi-part gold crown. The make-or-break details are the headpiece assembly and keeping the shoulder stole panels locked in place through a full con day. Designed for cosplayers comfortable with fitted garments and accessory construction. Includes 7 components, 14 materials with cost estimates, a 12-step build plan, and a realistic 7-week, $110 to $280 budget.
7 weeks
12
14
7
See the whole look before you start.
References, materials, budget, and build order for Cartethyia.
Timeline
7 weeks
Color refs
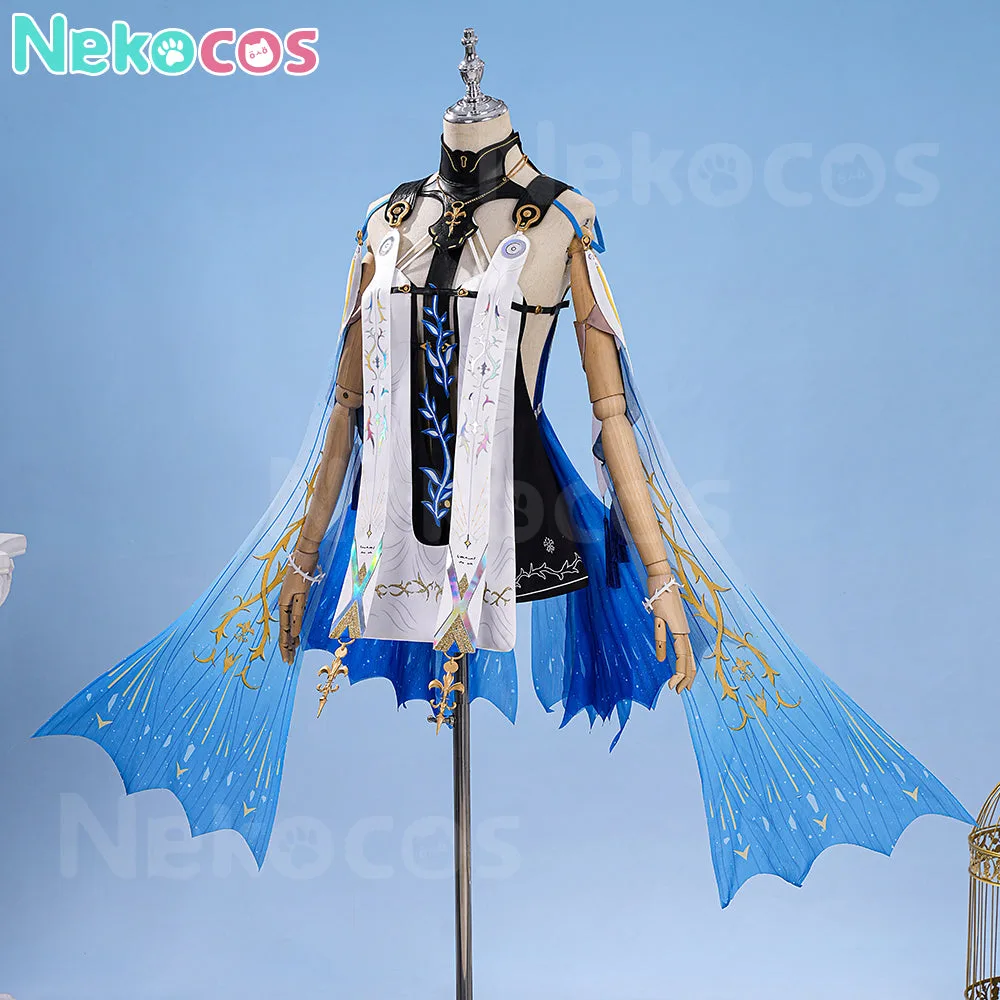
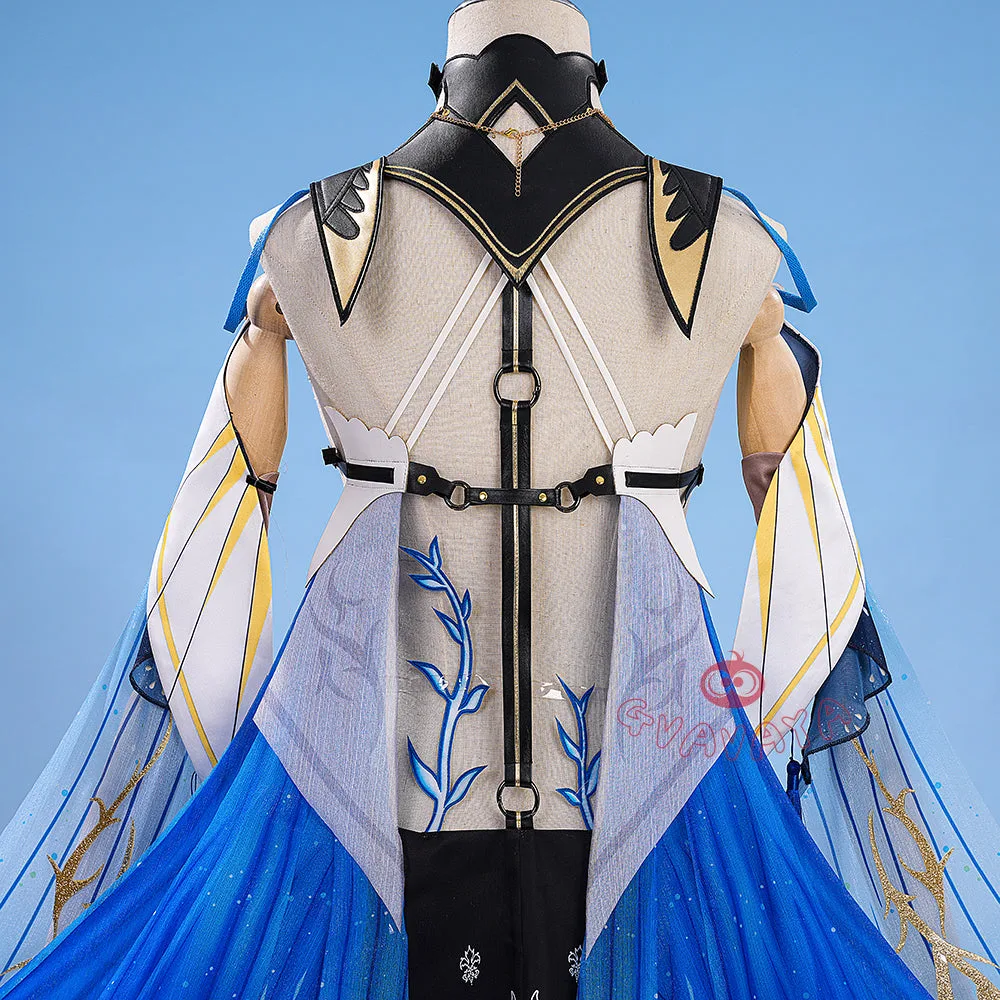
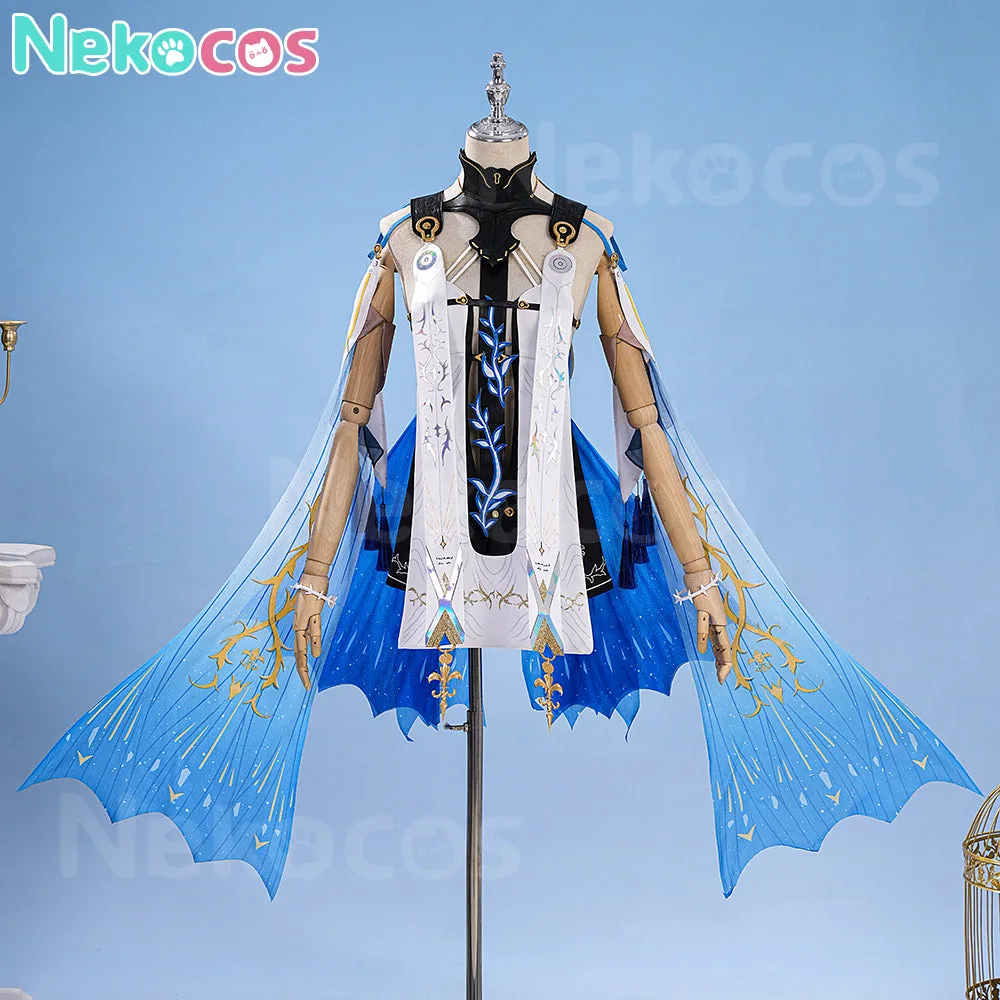
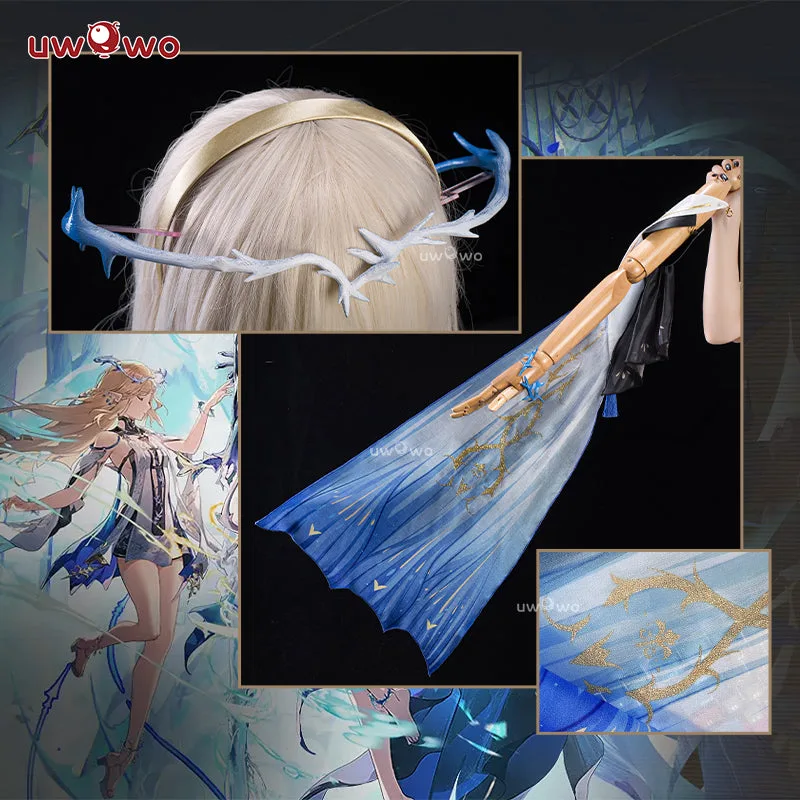
Materials
14 items
Budget
$110 - $280
save the visual refs
Full reference board
The preview above is curated for scanning. This is the working board you clone into your own build, with notes, colors, product images, and extra references intact.
Images are sourced from around the internet to help you get started. Use the web clipper to build your own reference library.
Reference images are gathered from around the web and belong to their original creators. We link back to where we found each one. If something here is yours and you want it taken down, email us and it is gone.
Build guide
I wore my first Cartethyia build for exactly four hours at Anime Expo before the stole panels had rotated to my back, the neck ornament was sideways, and the headpiece crown was tilted forward at a thirty-degree angle that made me look like I was bowing. I took it all off in the hotel room, put it in a garment bag, and wore a different cosplay for the rest of the weekend.
This is not a hard costume. But it will absolutely fall apart on you if you don't spend the right time on the parts that matter.
The undersuit is your foundation. Everything else attaches to it. Get the fit right first, mark where the stole snaps go, mark the ornament velcro positions, mark where the sleeve panels attach. Do this before you cut fabric for anything else. I took mine to the Joann in Burbank and had them help me find a black spandex that had enough body to hold its shape without a second lining, which saved me from my original (too thin, too sheer under flash) choice.
The stole panels are beautiful in the game art. They're also the build's biggest liability. If you just drape them over the shoulder of a smooth bodysuit, they will rotate off-center within the first hour. Every time. The fix is two anchor points: snap tape at the shoulder seam and a thin ribbon tie that loops under the arm at chest level. That second anchor is what actually stops the panel from rotating. One point of attachment is never enough.
Same idea for the floating sleeve panels, the long fabric pieces hanging from the shoulder to near the knee. Sew 20-gauge craft wire into the bottom hem before you attach them. Without the wire the panels flip inside-out in any crowd. With it, they hold that graceful swept drape from the game art.
The headpiece is the one thing I see go wrong the most. Multiple pieces that stack and pin together, and then the whole assembly needs to anchor to the wig. The move that works: cut a strip of 5mm EVA foam the same shape as the crown footprint, tuck it inside the wig cap before placing the crown. The anchor pins have something rigid to bite into instead of just wig fibers. Add a few bobby pins from the crown edges into the wig, and the crown doesn't move. I rebuilt mine at 11pm the night before Anime Expo after my first attempt failed a stress test, which is not a situation I recommend.
Assemble the headpiece completely off your head before you put it on. Lock all the pieces together as a unit, confirm nothing wobbles, then place it. Trying to build it piece by piece while wearing it is the exact failure mode that makes people give up and leave it in the bag.
Budget runs $110 to $280. Buying a pre-made base from Uwowo or DokiDoki and upgrading the anchoring is the smarter move for most builds, and costs significantly less than sewing from scratch. If you do buy pre-made, size up at least once. The bodysuit undersuit runs small, particularly across the bust. Every vendor, same story.
This is a seven-week build if you're sewing. Give yourself extra time around the headpiece and the anchoring tests, because those are the parts you'll need to redo at least once.
Components
Black fitted undersuit
White tabard and apron overlay
Shoulder stole panels
Floating sleeve panels
Multi-part headpiece crown
Arm and leg ornaments
Neck ornament and ear pieces
Pattern Plan
Real sewing patterns for each piece of the Cartethyia costume: the commercial base to start from, a free alternative where one exists, and the exact modifications that turn the base into the character-accurate piece.
Black fitted undersuit
Modifications for black fitted undersuit: Use View A (invisible back zipper, elasticized leg openings). Omit the collar if the pattern includes one, as Cartethyia's undersuit has a simple neckline. Grade the shoulder seam out by 1cm on each side to create a defined attachment ledge for the stole panels and sleeve panels. Cut the leg openings straight across rather than curved if using a high-cut silhouette.
M7217 is the community's go-to fitted cosplay bodysuit pattern. It's sized for stretch knits with clear seam allowances and a back zipper that makes a clean foundation for the layered pieces. If ordering online, note the pattern is still findable new and used. Size the pattern to your measurements, not a standard size, and ease in 10-15% for stretch recovery.
White tabard and apron overlay
Modifications for white tabard and apron overlay: Use the pullover tabard view (open sides, no ties). Shorten the hem from knee-length to hip-length to match Cartethyia's proportions. Remove the patch pockets. Add interfaced edges at the neckline and armscye for a clean finish against the bodysuit. The pattern's open-side construction works well as an overlay but needs to be tacked to the bodysuit at the shoulder and waist seams to prevent gaping.
The tabard shape is relatively simple and could also be drafted directly from the character reference: a front bib panel, a back panel, and shoulder seams connecting them. If the S9766 proportions aren't right for your size, drafting from a rectangle with shoulder seams is faster than modifying the pattern significantly.
Materials list
14 itemsEstimated total cost
$110 - $280
Milestone timeline
7 weeks- 1
Gather references and finalize which costume version to build
Research
- 2
Source undersuit fabric and test fit a mock-up
Materials
- 3
Draft the tabard front panel shape from references
Patterning
- 4
Cut and sew the undersuit with invisible zipper at back
Construction
- 5
Fit the undersuit and mark stole attachment points
Fitting
- 6
Cut and sew tabard with interfaced edges
Construction
- 7
Cut and hem the stole and floating sleeve panels with wire hem
Construction
- 8
Sew snap tape to bodysuit shoulder and stole backing
Construction
- 9
Source or build the headpiece crown and ornament set
Materials
- 10
Assemble headpiece off-head as one unit and test wig attachment
Finishing
- 11
Sew velcro anchors to costume at each ornament position
Finishing
- 12
Full suit-up, photos, and movement test to check panel drape and crown stability
Wear test
Frequently
asked questions.
Related tools and guides
Plan your build, estimate costs, and get ready.
Budget Calculator
Estimate your build cost before you start buying materials.
Convention Checklist
88-item packing checklist. Check off items as you pack.
Prop Scaling Calculator
Scale reference images to your body measurements.
How Much Does EVA Foam Armor Cost?
Real build budgets with specific products and dollar amounts.
Cosplay Commission Cost Breakdown
Real build budgets with specific products and dollar amounts.
Cosplay on Costumary
Templates, tools, and workspace built for cosplay makers.
Browse all templates
Explore build plans across 10 craft verticals.
Debut your cosplay build
Upcoming conventions where you could wear this. Dates, checklists, and budget tools included.
Start this build free
Clone this template into your workspace. Track materials, milestones, budget, and build progress in one place.
More from this series
Shorekeeper Cosplay
8 weeks · 14 milestones
Wuthering Waves' Guardian of the Black Shores, built around four make-or-break details: the asymmetric EVA foam headpiece with its veil, multiple sheer fabric layers that achieve an ethereal translucent effect without being revealing, the two-tone gradient wig, and the tacet mark forehead jewel. This is an advanced build mixing garment construction, foam fabrication, resin casting, and wig management. The sheer fabric layering and the headpiece stability are what separate a great Shorekeeper from one that falls apart by noon. Includes 7 components, 15 materials with cost estimates, a 14-step build plan, and a realistic 8-week, $220 to $480 budget.
Qifrey Cosplay
5 weeks · 12 milestones
Qifrey's elegant white-robed silhouette is built around three signature elements: the tall pointed hat with the bent tip and black ribbon, the flowing white cape with the brass brooch closure, and the asymmetrical pince-nez glasses with one dark lens hiding his scarred eye. This is an intermediate build that needs more structural crafting than sewing. The hat and glasses demand the most attention, while the cape is a manageable garment project. The glasses and the hat are the make-or-break details, and this template walks you through both. Includes 7 components, 15 materials with cost estimates, a 12-step build plan, and a realistic 5-week, $95 to $280 budget.
Coco Cosplay
6 weeks · 12 milestones
Witch Hat Atelier's apprentice witch in her full outfit: the tall pointed hat with ornamental band, a dark cloak with decorative hem trim, a layered tunic-dress, boots, and her drawing implements. The hat is the signature piece and the hardest to get right. 7 components, 13 materials, ~6 weeks at $120-280.
Sung Jinwoo Cosplay
7 weeks · 15 milestones
Solo Leveling's Shadow Monarch in his iconic default hunter outfit: a long black coat with purple inner lining, structured shoulder armor, fitted pants, and dual daggers. This is an intermediate hybrid build that combines garment sewing with foam armor crafting for the shoulder details, plus prop work for the daggers. The coat and its glowing purple lining are the make-or-break detail. Includes 7 components, 19 materials with cost estimates, a 15-step build plan, and a realistic 5-7 week, $120 to $320 budget.
Gojo Satoru Cosplay
5 weeks · 11 milestones
Jujutsu Kaisen's strongest sorcerer, built around three signature details: the black high-collar uniform jacket, the blindfold, and the white spiked hair. This is an intermediate build that leans on one well-made garment plus wig styling, so it reads instantly on the con floor without months of work. The collar and the wig are the make-or-break details, and this template walks you through both. Includes 6 components, 11 materials with cost estimates, an 11-step build plan, and a realistic 5-week, $90 to $240 budget.
Deadpool Suit Cosplay
5 weeks · 12 milestones
The Merc with a Mouth in full red and black: a head-to-toe spandex bodysuit with diamond-textured fabric, a face shell mask with white magnetic lenses, dual katanas on a concealed back harness, and a utility belt with pouches and holsters. An intermediate build that rewards patience with fit and details. Covers 7 components, 12 materials with cost estimates, a 12-step build plan across 5 phases, and a 5-week timeline at $120 to $350.
Igris Cosplay
9 weeks · 14 milestones
Sung Jinwoo's elite shadow knight: jet-black full plate armor with a purple glow edge, the iconic red hair-like plume from the helmet, a tattered black cape, and a longsword. This is a full-armor advanced build combining EVA foam or 3D printing with LED lighting effects and a fully enclosed helmet with visibility modifications. The helmet visibility solution is the make-or-break detail. Includes 8 components, 17 materials with cost estimates, a 14-step build plan, and a realistic 8-10 week, $200 to $520 budget.
Arlecchino Cosplay
7 weeks · 17 milestones
Arlecchino (The Knave) is Genshin Impact's most cosplay-demanding Fatui Harbinger: a layered suit jacket, structured long coat with back chains, multi-color ombre wig, character-specific X-pupil contacts, and a full accessories set that runs 12+ pieces. This is an advanced build for cosplayers who can sew structured garments, handle prop accessories, and plan a full character makeup look. The make-or-break details are the coat's lapel structure and the wig's silver-black-red color work. Includes 8 components, 14 materials with cost estimates, a 12-step build plan, and a realistic 7-week, $180 to $420 budget.