
Arlecchino Cosplay
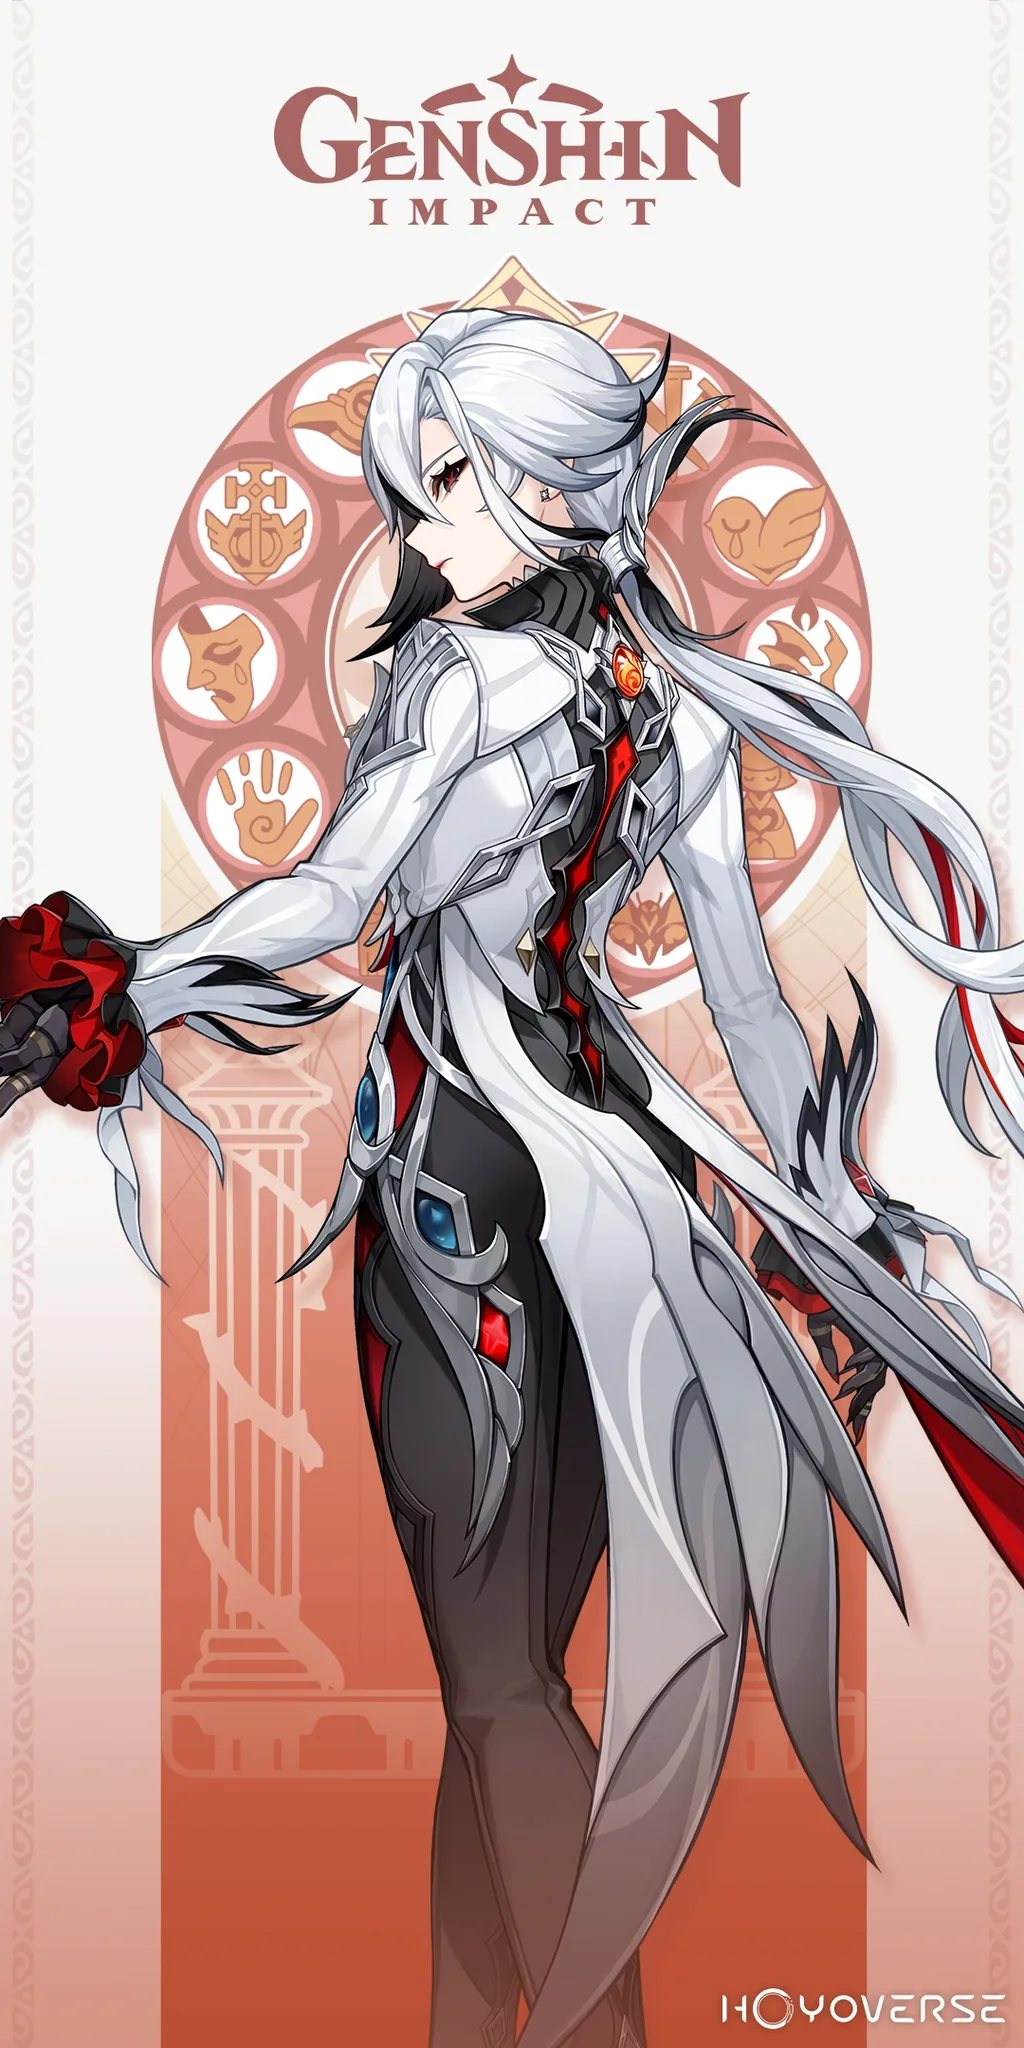
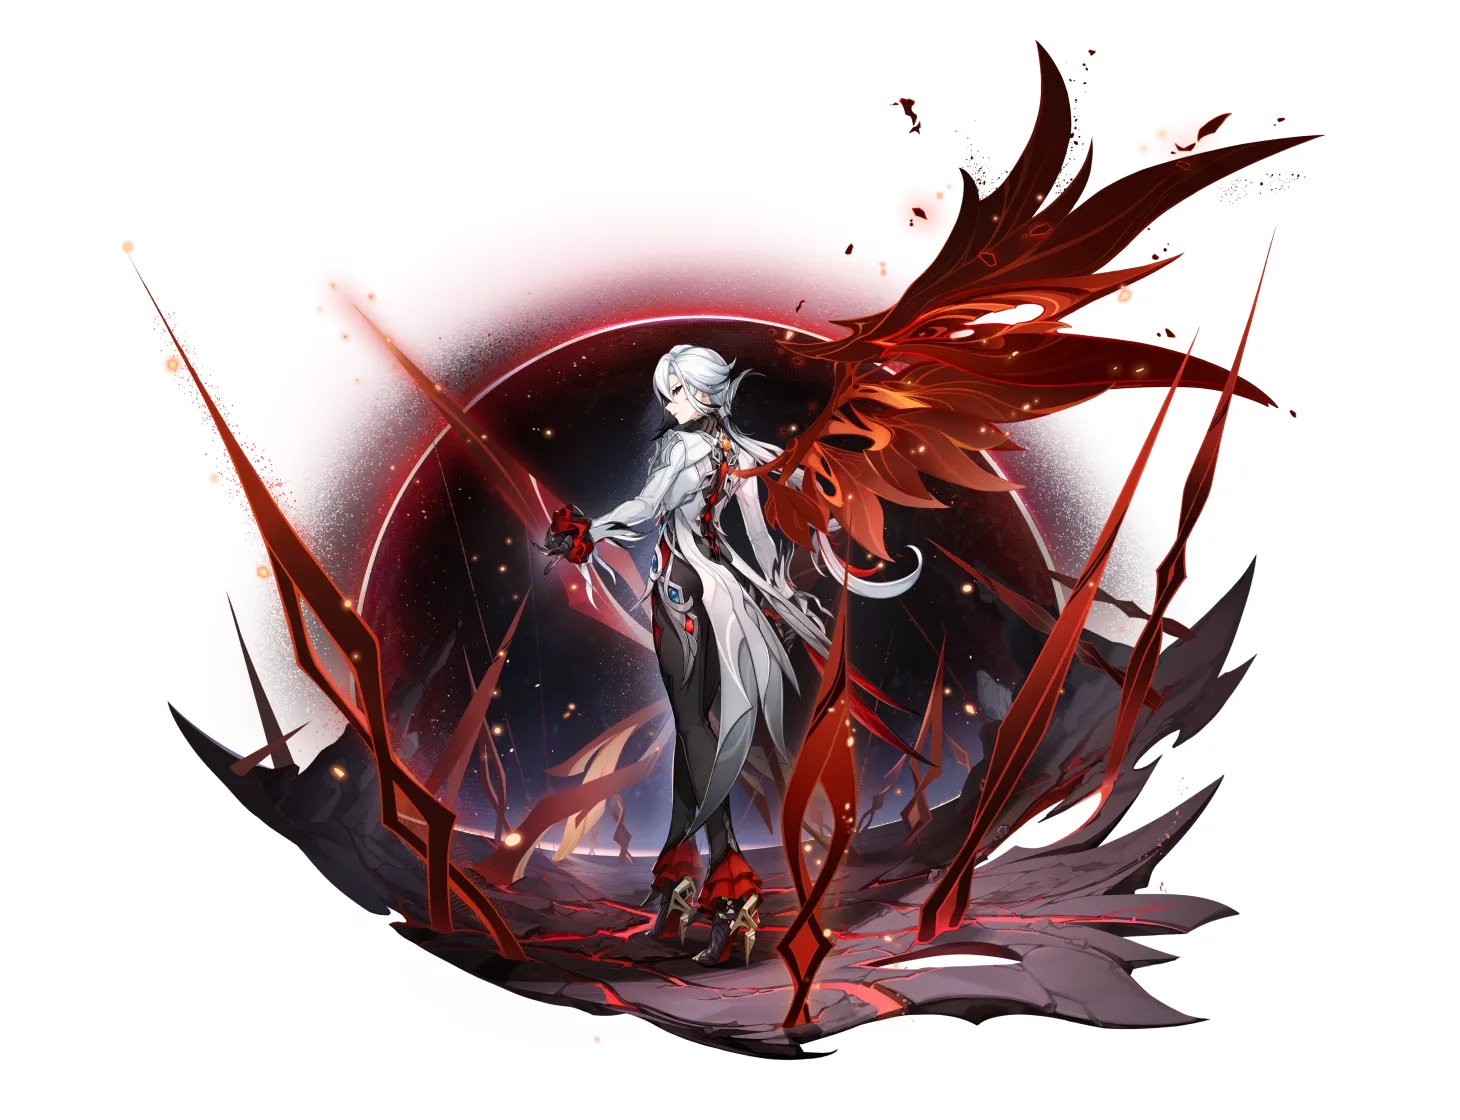
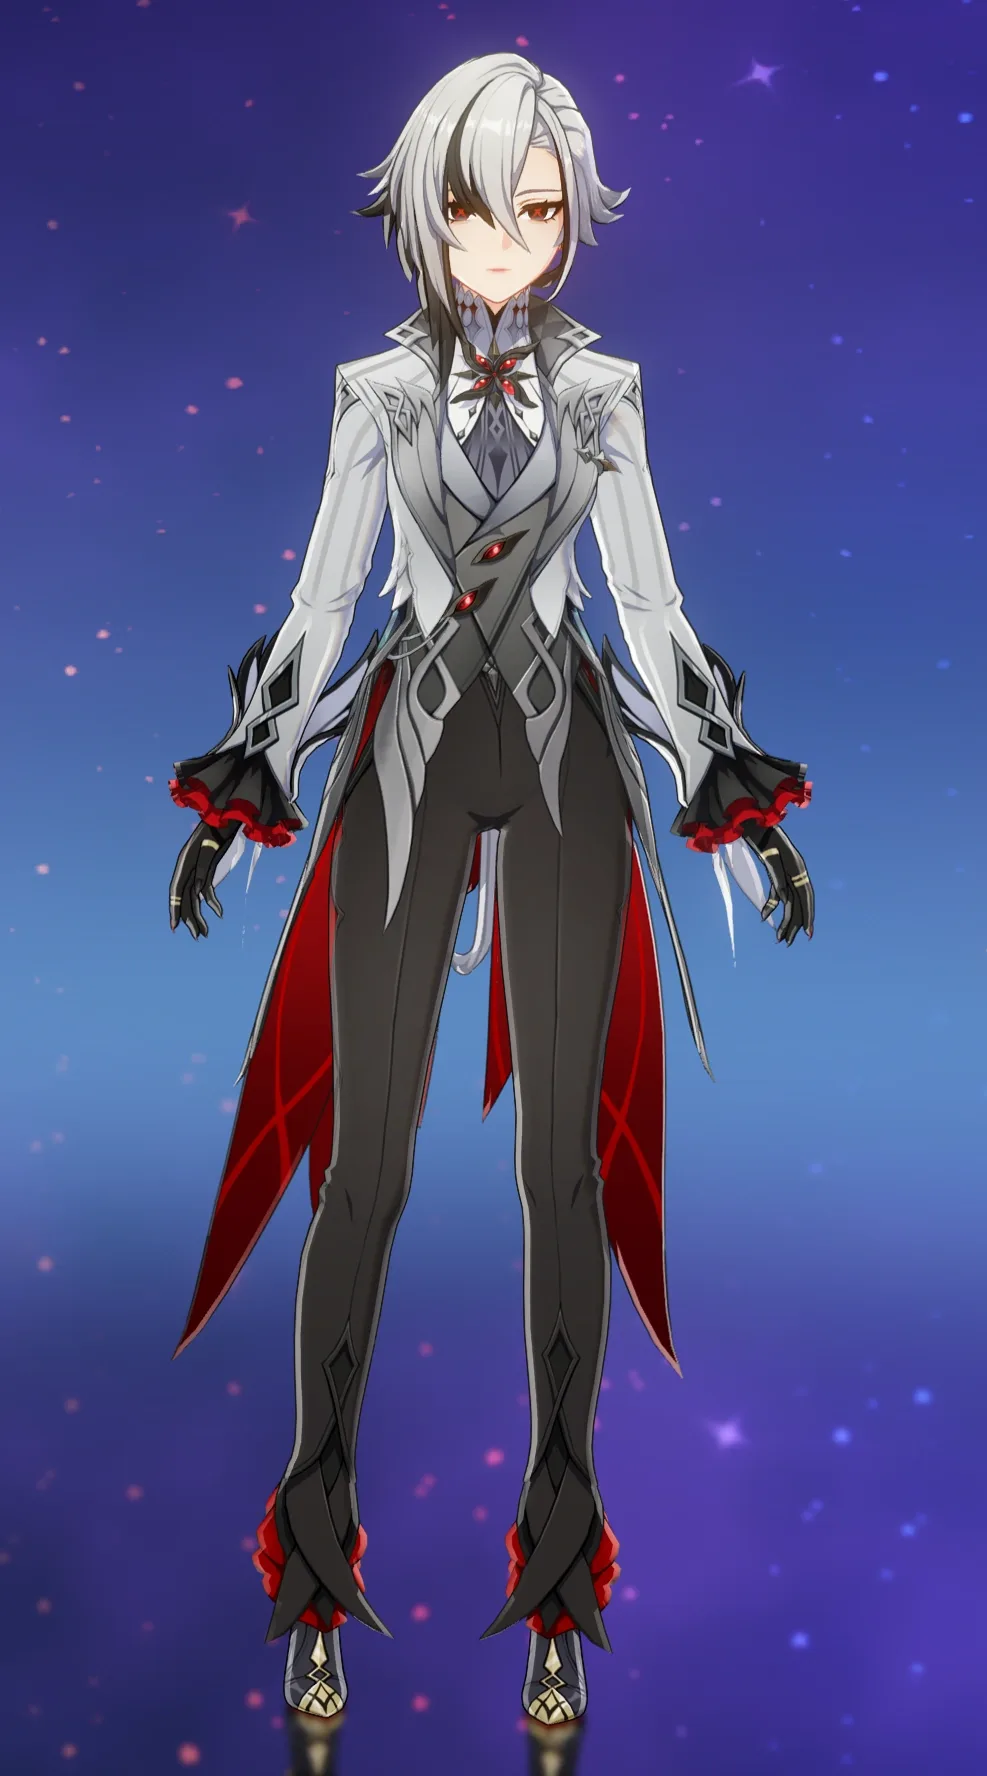
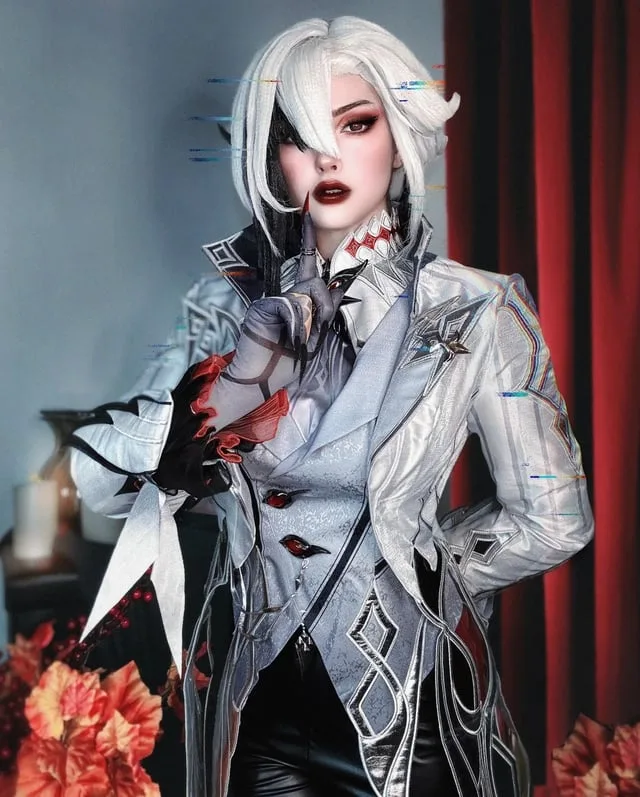
Arlecchino (The Knave) is Genshin Impact's most cosplay-demanding Fatui Harbinger: a layered suit jacket, structured long coat with back chains, multi-color ombre wig, character-specific X-pupil contacts, and a full accessories set that runs 12+ pieces. This is an advanced build for cosplayers who can sew structured garments, handle prop accessories, and plan a full character makeup look. The make-or-break details are the coat's lapel structure and the wig's silver-black-red color work. Includes 8 components, 14 materials with cost estimates, a 12-step build plan, and a realistic 7-week, $180 to $420 budget.
7 weeks
17
14
8
See the whole look before you start.
References, materials, budget, and build order for Arlecchino.
Timeline
7 weeks
Color refs
Materials
14 items
Budget
$180 - $420
save the visual refs
Full reference board
The preview above is curated for scanning. This is the working board you clone into your own build, with notes, colors, product images, and extra references intact.
Images are sourced from around the internet to help you get started. Use the web clipper to build your own reference library.
Reference images are gathered from around the web and belong to their original creators. We link back to where we found each one. If something here is yours and you want it taken down, email us and it is gone.
Build guide
My first Arlecchino coat had uninterfaced lapels. I wore it to Sakura-Con in April and by noon they'd flopped open like sad little ears and the entire silhouette was gone. I fixed it for the afternoon slot with safety pins hidden under the front placket, which is not how you want to spend Sakura-Con.
The lapels are the thing that will ruin this build if you get them wrong. Everything else is recoverable. The coat is long enough to hide imperfect hemwork. The wig ships styled. The contacts are their own separate problem (more on that). But the lapels have to hold their shape through a full con day under body heat and three layers of fabric, and the only way that happens is heavyweight sew-in interfacing on the lapel and collar pieces before you ever touch the outer fabric. Not fusible. Sew-in. Fusible interfacing bubbles and separates under heat, and the charcoal suiting this coat wants is dense enough that fusing is inconsistent anyway. I use a firm tailoring canvas from Portland Textile in Portland, Oregon, baste the roll line before I cut, and then press the lapel curve over a tailor's ham about twelve times before it stays. It sounds excessive. It is not excessive.
The fabric question matters too. Arlecchino's coat is deep charcoal, not flat black. I learned this by holding a swatch of black polyester gabardine next to a screenshot of her in-game model under fluorescent lighting in the Joann in Torrance, and the gap was obvious. You want something with a slight sheen and weight, a ponte or wool-blend suiting, closer to dark grey than true black. The color shift is subtle in person but cameras pick it up and the community will pick it up in photos.
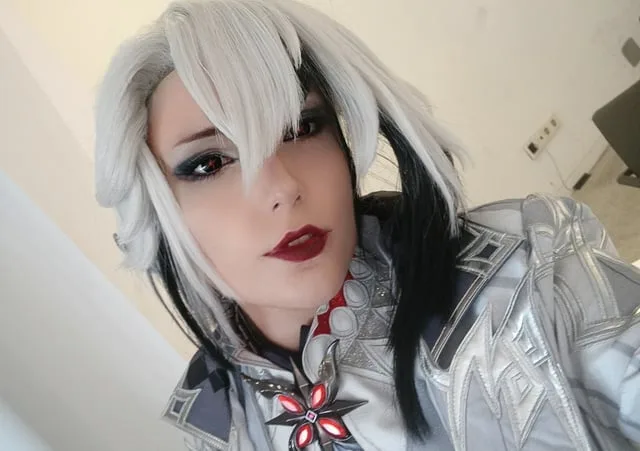
Order the wig and contacts the same day you start the coat. The Sweety Crazy Knave Cross contacts ship from Asia and take 2-3 weeks. They're the only contacts that actually read as her X pupils on camera, but I'm not going to pretend you can walk a convention floor in them. One reviewer said they had to hold things close to their face to read and needed help navigating crowds. That tracks with my experience. Wear them for photos, swap to plain dark red contacts for hall wear, and don't argue with yourself about this.
The wig: buy pre-styled from SAKUMETA or OSIAS. The silver-black-red ombre color work is genuinely tedious to DIY (one TikTok creator described the process as 'colour blocking, hairline work, parting, wire strands, and airbrushing') and a quality pre-styled wig runs $45-80, which is less than a weekend of your time. Check the front hairline before you're at the con. It's a known weak point on pre-made Arlecchino wigs and requires a few additional wefts glued in to close the gap.
For the forehead X: face paint only. Red face paint, not lipstick, not eyeshadow. Mark your forehead center first with a white eyeliner pencil, paint the X symmetrically outward, and seal it immediately with setting spray. Without sealing it softens within two or three hours. Practice the X twice before con day, because symmetry on a curved surface is harder than it looks in a mirror.
This is a $180 to $420 build over about 7 weeks. The coat and jacket are the time cost. The accessories (back chains, collar piece, headpiece with feathers) are the budget cost, but they're all sourceable: real jewelry chain for the back, a printed clip for the headpiece, the decorative pieces from Etsy STL sellers. Skip the waist chain on the hall floor. It catches on everything.
Start with the coat. Everything else fits around it.
Components
Structured long overcoat
Fitted suit jacket and vest
Inner shirt and trousers
Multi-color ombre wig
X-pupil contact lenses
Back chains and collar decoration
Headpiece with black feathers
Forehead X makeup and sharp eyes
Pattern Plan
Real sewing patterns for each piece of the Arlecchino costume: the commercial base to start from, a free alternative where one exists, and the exact modifications that turn the base into the character-accurate piece.
Structured long overcoat
Modifications for structured long overcoat: Use the longer view. Taper the silhouette at the waist before flaring below the hip to match Arlecchino's fitted-then-dramatic coat shape. Convert the double-breasted front to a single-breasted closure with hidden snap fasteners under the front placket. Omit the fur collar option and use the plain notched collar. Raise the back vent height by 4-5 inches for dramatic tail movement. Interface collar and lapels with sew-in tailoring canvas, not fusible.
Modifications for structured long overcoat: This coat runs to mid-back (~55 inches back length) which suits the length needed. Remove the gathered two-piece sleeves in favor of a standard one-piece set-in sleeve for a cleaner modern silhouette. Omit the contrasting collar and use self-fabric. Add structured shoulder seams with shoulder pads. Interface all collar and lapel pieces with sew-in canvas only.
Neither commercial pattern matches Arlecchino's coat exactly. The S3177 requires waist shaping modifications; the M8137 requires sleeve simplification. Either is a valid starting point. The key alteration is the same for both: the coat must pull in at the waist and have fully interfaced, sharp-breaking lapels.
Fitted suit jacket and vest
Modifications for fitted suit jacket and vest: Use the stand collar jacket view as the base for Arlecchino's fitted jacket, and the collarblocked vest view for the under-vest. The stand collar already matches her character design. Convert the separating zipper front to button closures on the vest. Interface all lapel and collar pieces with sew-in interfacing; the pattern recommends fusible but sew-in holds better under the overcoat's weight.
Modifications for fitted suit jacket and vest: Use View A (single-breasted). The peaked lapels are a closer match to Arlecchino's jacket lapels than the notched lapels on most men's patterns. Omit shoulder pads or use very thin ones; Arlecchino's jacket has a structured but not heavily padded shoulder. Add a stand-up collar piece from McCall's M5252 or S9191 if you want her raised collar element.
S9191 is the more forgiving base and includes both jacket and vest in one envelope. V8988 gives better lapel shaping but requires more tailoring skill. If you're sewing the overcoat and jacket in the same session, use S9191 for the jacket so you can focus your advanced techniques on the overcoat.
Materials list
14 itemsEstimated total cost
$180 - $420
Milestone timeline
7 weeks- 1
Gather references: official art, in-game model screenshots, cosplay build logs
Research
- 2
Order the wig and contacts immediately (2-3 weeks shipping)
Materials
- 3
Source coat and jacket fabric and test color in natural light
Materials
- 4
Source the coat pattern and test fit in muslin
Patterning
- 5
Mock up the vest lapels in scrap fabric
Patterning
- 6
Draft or source the suit jacket pattern
Patterning
- 7
Cut and sew the coat shell
Construction
- 8
Interface and set the collar and lapels
Construction
- 9
Line the coat and finish all edges
Construction
- 10
Sew the suit jacket and vest; interface vest lapels
Construction
- 11
Cut and sew the inner shirt
Construction
- 12
Hem trousers and finish the base layers
Construction
- 13
Source or print the chain and collar hardware; attach chains to coat back
Details
- 14
Construct or print the headpiece clip, glue in feathers
Details
- 15
Style the wig: set waves, secure sections, trim fringe
Finishing
- 16
Practice the makeup look twice before con day
Finishing
- 17
Full suit-up test: all layers, accessories, wig, makeup, contacts
Wear test
Frequently
asked questions.
Related tools and guides
Plan your build, estimate costs, and get ready.
Budget Calculator
Estimate your build cost before you start buying materials.
Convention Checklist
88-item packing checklist. Check off items as you pack.
Prop Scaling Calculator
Scale reference images to your body measurements.
How Much Does EVA Foam Armor Cost?
Real build budgets with specific products and dollar amounts.
Cosplay Commission Cost Breakdown
Real build budgets with specific products and dollar amounts.
Cosplay on Costumary
Templates, tools, and workspace built for cosplay makers.
Browse all templates
Explore build plans across 10 craft verticals.
Debut your cosplay build
Upcoming conventions where you could wear this. Dates, checklists, and budget tools included.
Start this build free
Clone this template into your workspace. Track materials, milestones, budget, and build progress in one place.
More from this series
Raiden Shogun Cosplay
8 weeks · 14 milestones
Genshin Impact's Electro Archon, built around a layered kimono-bodysuit hybrid, EVA foam armor, a 105cm braided purple wig, and the Musou no Hitotachi sword. This is an advanced build mixing garment construction, foam shaping, LED work, and heavy wig management. The make-or-break detail is purple color matching across fabric, paint, and wig. Includes 7 components, 15 materials, a 14-step plan, and a realistic 8-week, $250 to $550 budget.
Hu Tao Cosplay
6 weeks · 15 milestones
Hu Tao is Genshin Impact's ghost-whispering funeral director: a warm brown mandarin-collar coat with gold-printed trim, the iconic porkpie hat loaded with talisman and plum blossom, twin dark braids with crimson tips, and flower-shaped pupils. The hat is the whole build — it has to be constructed accurately, fitted over the wig, and survive a full con day without slipping. Fabric-sewing cosplayers can tackle this; the coat's silhouette is cleaner than other Genshin builds. Plan for 7 components, 13 materials, and a 6-week build at $100-280.
Sandrone Cosplay
8 weeks · 16 milestones
Sandrone is Genshin Impact's puppet-master Harbinger: a structured dark dress with cream accents, an elaborate multi-element headdress, mechanical shoulder armor, and her iconic star eye markings. This is an advanced build where the headdress and the boned bodice are the make-or-break details. Get those two right and the rest falls into place. Includes 7 components, 14 materials with cost estimates, a 12-step build plan, and a realistic 8-week, $150-350 budget.
Yae Miko Cosplay
6 weeks · 14 milestones
Genshin Impact's shrine maiden guuji: the soft pink wig with custom fox ears, the red-and-white robe with asymmetrical cut, and the detachable weighted tail. The ears must be made from wig material or heavily anchored, the red fabric needs color-matching precision, and the tail needs weighted construction to avoid dragging. 6 components, 12 materials, about 6 weeks, $110 to $280.
Furina Cosplay
6 weeks · 14 milestones
Fontaine's Hydro Archon in full Rococo splendor: the tilted top hat, cascading jabot collar, split-tail coat, and white-to-blue gradient wig with a wired ahoge. The hat is the make-or-break piece. It needs to hold its shape, sit at the right angle, and stay on the wig through a full convention day. 7 components, 13 materials, about 6 weeks, $120 to $300.
Qifrey Cosplay
5 weeks · 12 milestones
Qifrey's elegant white-robed silhouette is built around three signature elements: the tall pointed hat with the bent tip and black ribbon, the flowing white cape with the brass brooch closure, and the asymmetrical pince-nez glasses with one dark lens hiding his scarred eye. This is an intermediate build that needs more structural crafting than sewing. The hat and glasses demand the most attention, while the cape is a manageable garment project. The glasses and the hat are the make-or-break details, and this template walks you through both. Includes 7 components, 15 materials with cost estimates, a 12-step build plan, and a realistic 5-week, $95 to $280 budget.
Coco Cosplay
6 weeks · 12 milestones
Witch Hat Atelier's apprentice witch in her full outfit: the tall pointed hat with ornamental band, a dark cloak with decorative hem trim, a layered tunic-dress, boots, and her drawing implements. The hat is the signature piece and the hardest to get right. 7 components, 13 materials, ~6 weeks at $120-280.
Sung Jinwoo Cosplay
7 weeks · 15 milestones
Solo Leveling's Shadow Monarch in his iconic default hunter outfit: a long black coat with purple inner lining, structured shoulder armor, fitted pants, and dual daggers. This is an intermediate hybrid build that combines garment sewing with foam armor crafting for the shoulder details, plus prop work for the daggers. The coat and its glowing purple lining are the make-or-break detail. Includes 7 components, 19 materials with cost estimates, a 15-step build plan, and a realistic 5-7 week, $120 to $320 budget.